Sådan laver du en størrelsesguide i Delaware-temaet
Trin-for-trin guide til at sætte en størrelsesguide op i Delaware-temaet på Shoporama. Aktivér theme-setting, opret en webshop-side og en produktlabel med ens tag, og vis guiden i en accordion på produktsiden.
The Size Guide feature in the Delaware theme gives your customers a quick overview of measurements and sizes right on the product page. Once set up, a drop-down button labeled “Size Guide” appears on the products you select. When a customer clicks the button, a table or text box opens with the exact information you’ve entered. This is especially useful for clothing, shoes, rings, sportswear, and other items where fit determines whether the customer places an order or returns the item.
Tip: A good size guide can significantly reduce the return rate. The customer feels confident keeping the item because she has measured herself and seen that the size fits.
How the size guide works in the Delaware theme
The feature relies on three interconnected elements:
- A theme setting that enables the feature in the Delaware theme.
- A webshop page that contains the guide content itself and has a tag starting with “size-guide” (e.g., “size-guide-clothing”).
- A product label with the exact same tag, which you assign to the products where the guide should appear.
When a product has a label whose tag contains the string “size-guide,” the theme automatically looks up a page with the same tag and displays its content in a drop-down on the product page. This works identically in both Delaware and DelawareDK.
Step 1: Enable “Enable size guide” in the theme settings
Go to Design in the admin panel and open your active Delaware theme. Click Settings and find the Product section. Check the box next to “Enable size guide.” If you want to change the label on the drop-down button, you can fill in the “Size guide title” field. If you leave it blank, the theme will automatically display “Size Guide” (or “Size guide” if the customer is on an English-language version of the store). Remember to click Save.
If you want a complete overview of the Delaware theme’s settings, you can read the guide for the Delaware theme.
Step 2: Create a store page with the guide itself
Go to Content → Static Pages and create a new page. Give it a descriptive name, such as Clothing Size Guide. In the content field, write the guide itself—typically a table with sizes and measurements, along with brief instructions on how customers can measure themselves.
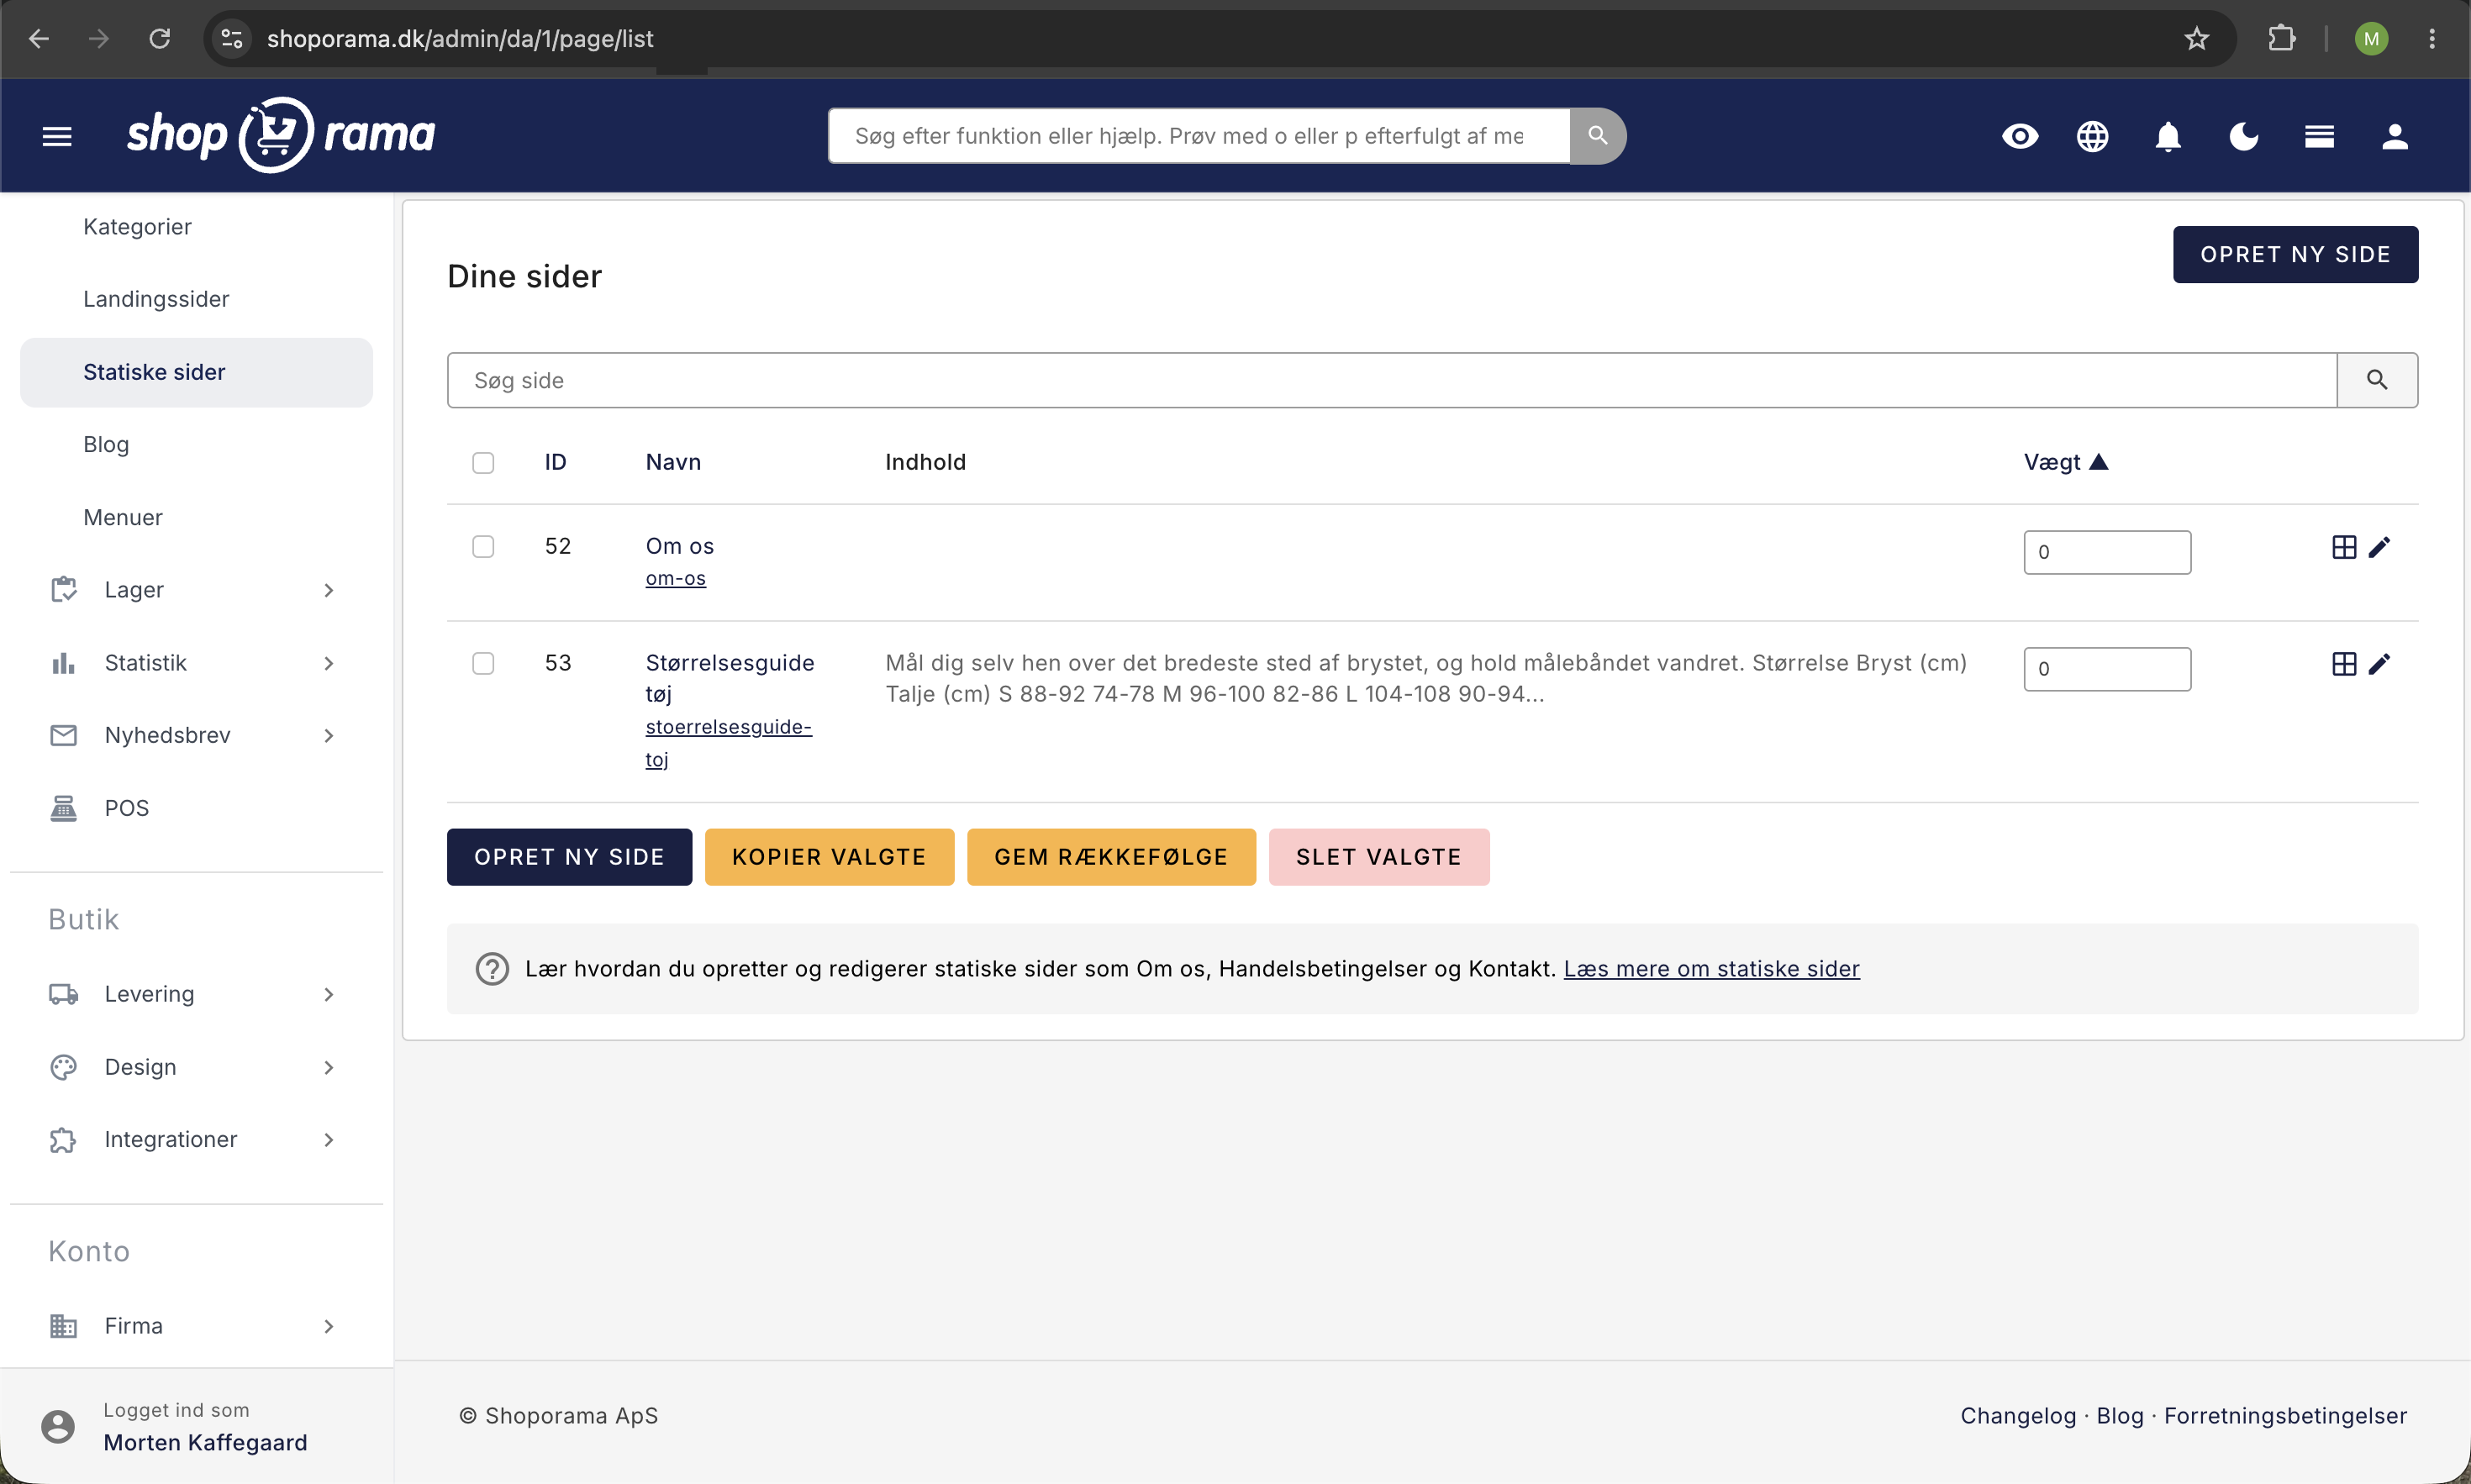
Important: In the “Tag” field on the page, enter a tag that starts with “size-guide.” Feel free to add a suffix that describes the product type, such as “size-guide-clothing ” or “size-guide-shoes.” Use lowercase letters and hyphens. Save the page.
You can find more information about pages and how to tag them in the article on static pages.
Step 3: Create a product label with the same tag
Go to Product Labels under Products and click Create New. Give the label a name, such as “Clothing Size Guide,” and enter the exact same value in the “Tag” field as on the page—that is, “size-guide-clothing.” This is the tag that links the product to the page, so it must be identical, character for character. Select a color if you’d like, and save.

Read more about product labels and how to use the “Tag” field in the article on product labels.
Step 4: Assign the label to the relevant products
Open a product in edit mode and locate the “Labels” section. Check the box next to the label you just created, then save. You can also select multiple products in the product list and assign the label in bulk via “Bulk Actions,” so you don’t have to edit products one at a time.
Once the label is applied to the product, the expand button will automatically appear on the product page. You can find details about the Labels section in the product editing guide.
Example of page content
You can use a simple HTML table like this one in the content field on the page. It works well inside the expand button:
<p>Measure yourself across the widest part of your chest, keeping the measuring tape horizontal.</p>
<table>
  <tr><th>Size</th><th>Chest (cm)</th><th>Waist (cm)</th></tr>
  <tr><td>S</td><td>88-92</td><td>74-78</td></tr>
  <tr><td>M</td><td>96-100</td><td>82-86</td></tr>
  <tr><td>L</td><td>104-108</td><td>90-94</td></tr>
  <tr><td>XL</td><td>112-116</td><td>98-102</td></tr>
</table>
A small image showing where to take measurements often says more than many words. Upload the image using the editing tool on the page and place it above or next to the table.
Multiple guides for different product types
Clothing, shoes, and rings have very different measurements, and a single combined table can confuse customers. Instead, create a separate guide for each product type:
- A page tagged “size-guide-sweaters” and a matching label.
- A page tagged “size-guide-pants” with a matching label.
- A page tagged “size-guide-shoes” with a matching label.
Each combination is independent of the others. You can have as many guides as you like, as long as the tag starts with “size-guide” and the page and label have exactly the same tag.
Tips
- Keep the table simple. 3–5 key measurements are often enough. Long tables with 14 columns will scare customers away from the “Buy” button.
- Check it on a mobile device. Many customers shop from their phones. Open a product page on your own phone and see if the table fits on the screen.
- Explain how to measure. A brief guide above the table reduces errors, e.g., “Measure your waist where your pants waistband usually sits.”
- Add multiple sizing systems. If you have international customers, include EU, UK, and US sizes in addition to Danish sizes.
- Keep it up to date. If you switch suppliers and the fit changes, update the guide at the same time; otherwise, the return rate will increase.
Frequently Asked Questions
What’s the difference between a page and a label?
The page is where you write the actual content—that is, the table with sizes and measurements. The label is a sticker you attach to the products where the guide should be displayed. Think of the label as a small Post-it note that says, “Display the size guide page here.” The tag field on both must be identical, as that’s what links them together.
Does the tag have to be exactly the same on the page and the label?
Yes, character for character. If you write “size-guide-clothing” on the page and “size-guide-clothing” on the label, the theme won’t find the page. Stick to lowercase letters, numbers, and hyphens, and copy the tag between the page and the label to avoid typos.
Do I have to attach the label to every single product manually?
No. You can select multiple products in the product list and assign the label in bulk via Bulk Actions. It’s quick, whether you’re dealing with 100 or 1,000 products. You only need to do this for products where size is relevant.
Can I have different guides for different product categories?
Yes, and that’s what we recommend. Create one page and one label per product type, such as size-guide-sweaters, size-guide-pants, and size-guide-shoes. Assign the correct label to the right products, and customers will see the correct guide on each product.
What happens if a product has multiple labels with “size-guide” in the tag?
The theme displays only the first one. For example, if a product has both “size-guide-clothing” and “size-guide-shoes,” the order determines which guide the customer sees. Use only one “size-guide” label per product to avoid surprises.
Can I include HTML, tables, and images in the guide?
Yes. The page is treated as regular page content, so tables, images, and links work as expected. Tables are clearly best for the measurements themselves, and a small image showing measurement points helps the customer get started. Keep it simple so it also works on mobile.
Does the guide affect SEO or page speed?
The content is stored as regular HTML on the product page, even when the expand button is closed. Google can therefore index it, and you can get long-tail traffic for search terms like “size guide [product category].” The impact on page speed is minimal if the guide consists of plain text and tables. If you use large images or video, make sure to compress the files.
Can I test the guide without it being visible to all customers right away?
Yes. Set the online store page to offline while you’re working on the content, or assign the label to a single test product first. Open the product in an incognito tab and check that the expand button appears and the content looks correct. Once it’s working, you can put the page online and assign the label more widely.
I’ve enabled the setting, but the button isn’t showing up. What’s wrong?
Three things must be in place at the same time: 1) “Enable size guide” is turned on in the theme settings and saved, 2) the product has a label whose tag starts with “size-guide,” and 3) there is a webshop page with the exact same tag, and that page is live. Check for spelling errors in the tag in both places. This is the most common reason why the button doesn’t appear.
If you need help, feel free to contact us at support@shoporama.dk.
Related articles
Delaware-themed configuration and customization
Complete guide to setting up the Delaware theme on your Shoporama online store. Footer, mega menu, colors, payment icons, Trustpilot, Instagram...
Product labels
Learn how to use product labels in Shoporama to organize and categorize your products with color-coded labels.
Edit product
Guide to the product editing page in Shoporama. Overview of all tabs in the order they appear: General, Images, Categories, Labels, Inventory,...
Pages
Learn how to create and edit static pages like About Us, Terms & Conditions and Contact in Shoporama.
Related features
Full design freedom - your design, your rules
Design your online store freely with full access to HTML, CSS and templates. Use templates, Page Builder or build from scratch.
Theme Settings in Delaware: Store and Products
An explanation of all fields in Delaware's store and product theme settings: colors, badges, value propositions, filters, categories, product...