Pick list
How to use the picking list in Shoporama: the queue, shelf location for each item, scanning with a barcode scanner, printing picking slips, and the four buttons that complete an order.
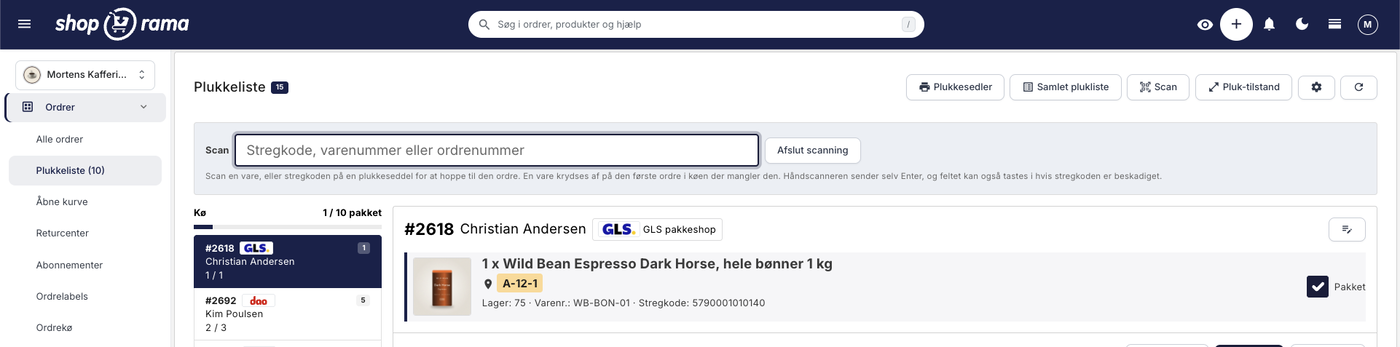
The picking list compiles all the orders that need to be packed on a single page. You’ll see each item with a photo, quantity, shelf location, item number, and stock level; you can check items off as you pick them, and update the order’s status without leaving the page. You can scan the items with a standard barcode scanner, and you can print both a picking slip per order and a consolidated picking list for all of the day’s orders.
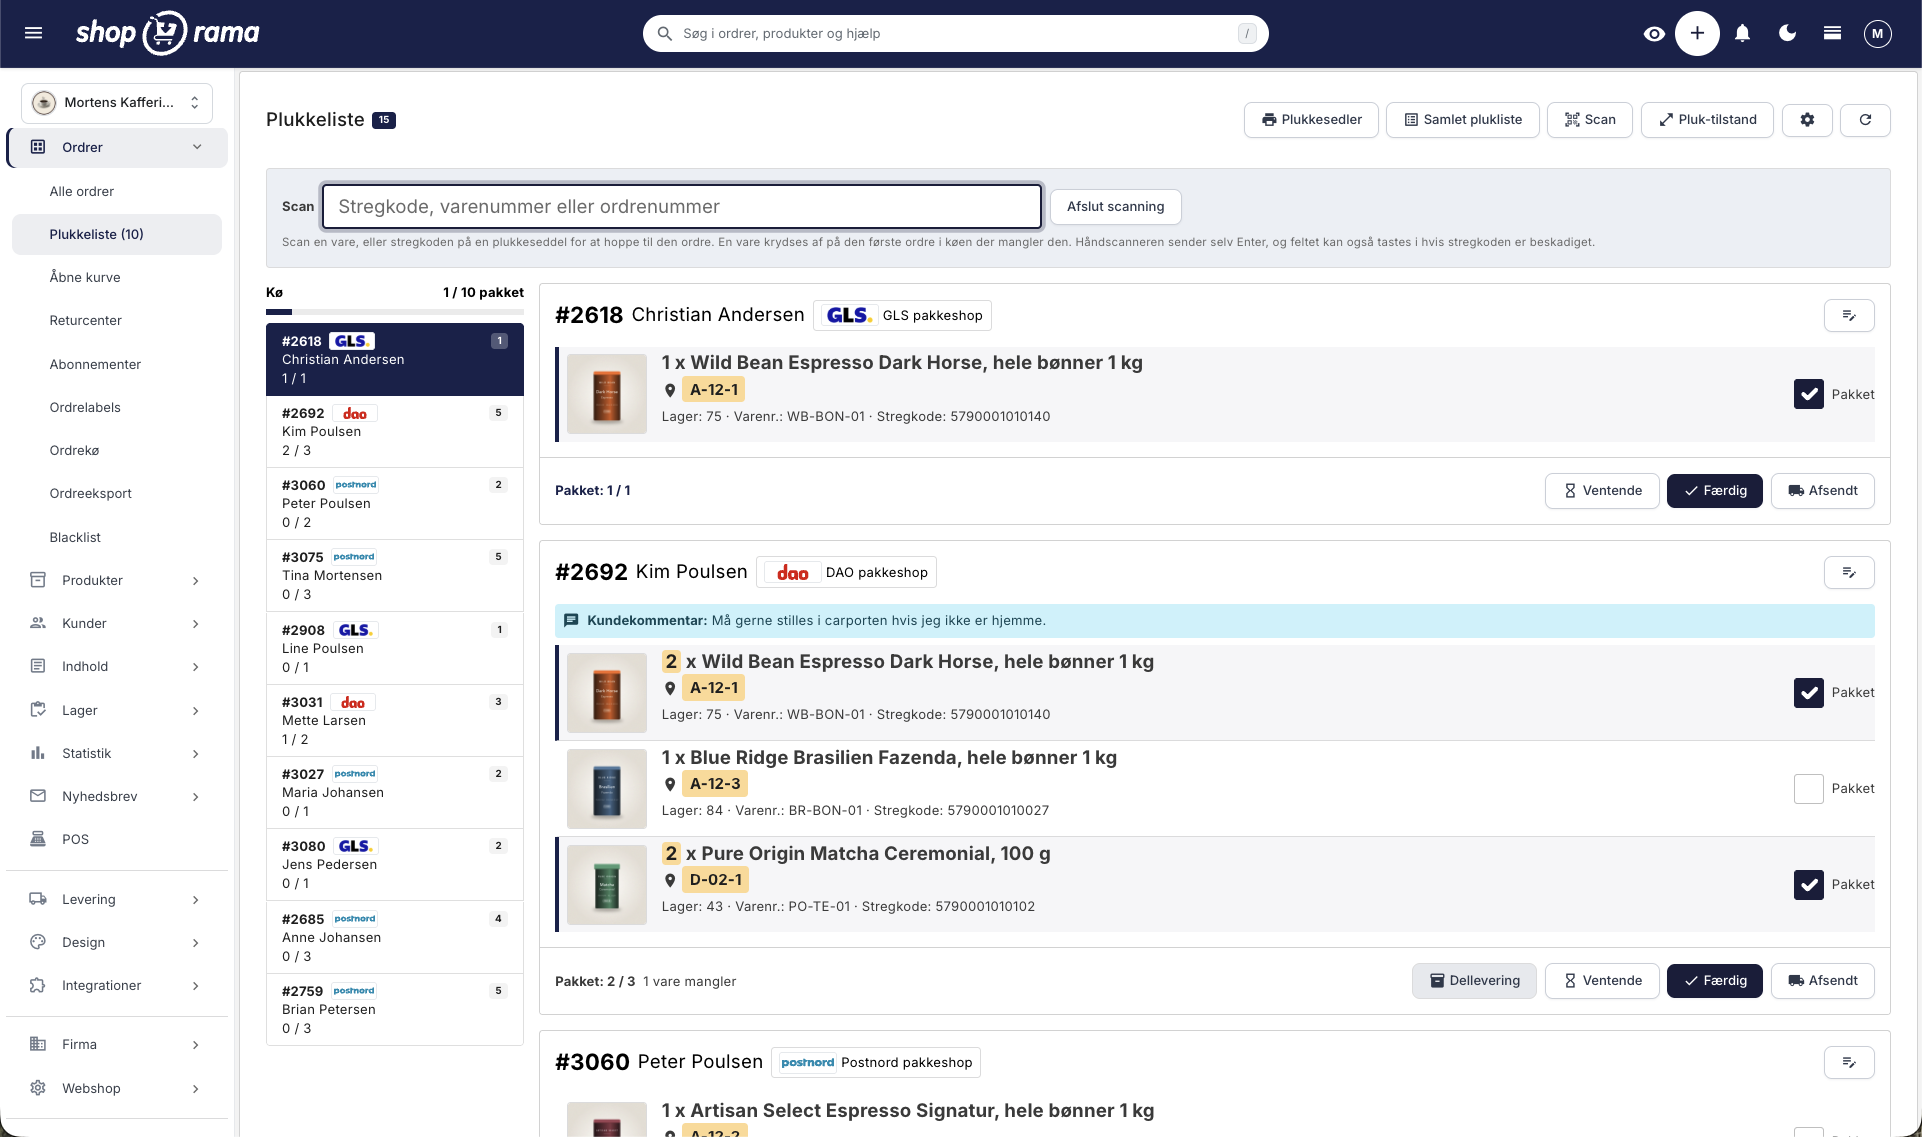
How to find the picking list
You’ll find the picking list under Orders → Picking List in the admin panel. By default, it’s also located under Shortcuts at the top with the number in parentheses, and you can hide it from there if you don’t use it.
The list builds itself. You don’t need to create or maintain anything: it automatically displays all paid orders with the status “In Progress” (it’s called “In Progress” in the order list’s status menu), with the oldest order first. The number next to the header represents the entire queue, not just the orders you can see on the screen.
Oldest order first
The order is intentional. The customer who has been waiting the longest gets their order packed first. Ten orders are displayed at a time, and you can scroll using the page numbers at the bottom of the page.
The Queue: Overview of Today’s Work
On the left-hand side is the queue with all the orders on the page. For each order, you’ll see the order number, the customer’s name, the shipping company’s logo, how many items still need to be picked, and how far you’ve gotten (e.g., 2/3). If you click on an order in the queue, the page jumps to that order.
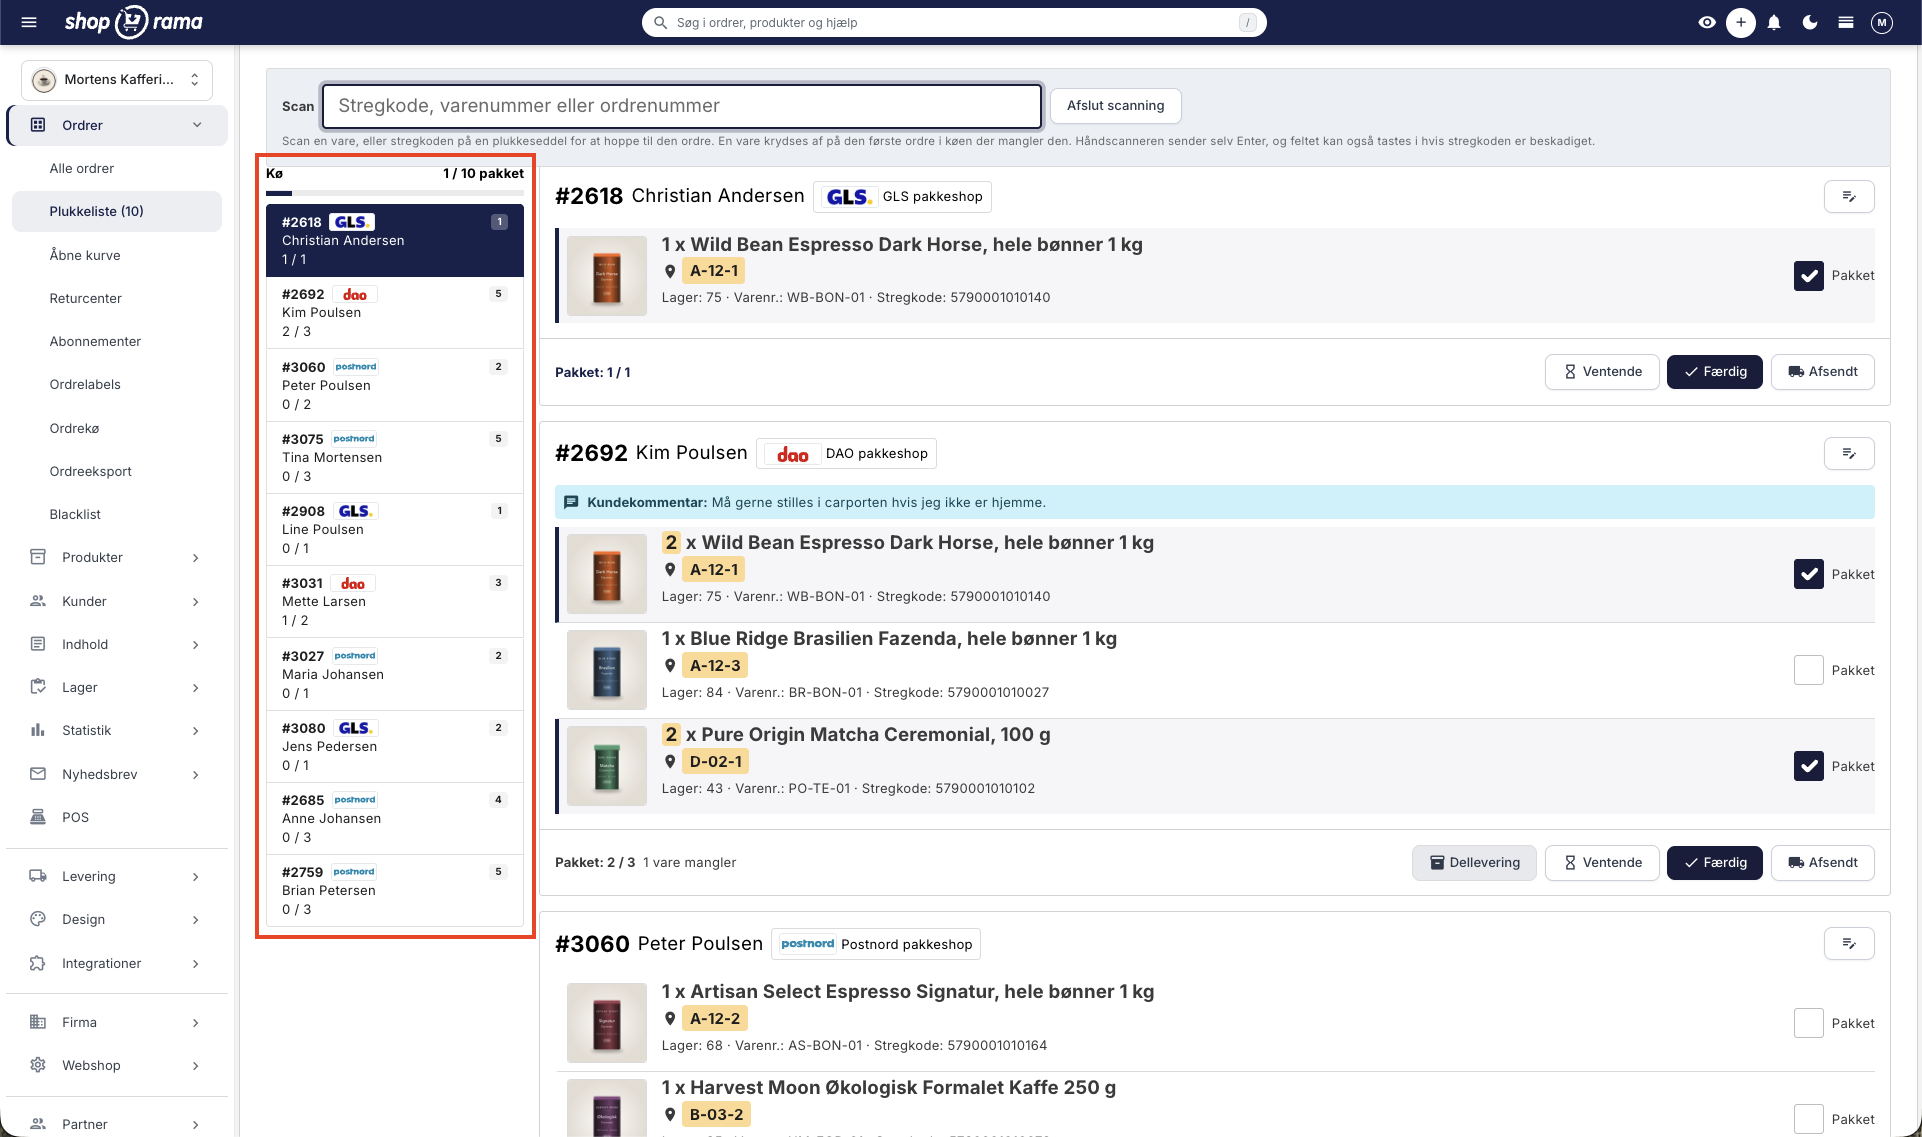
The queue looks different depending on which screen you’re using:
- Computer · The queue appears as a fixed list on the left side and moves with you as you scroll
- Tablet · The queue appears as a horizontal bar at the top, so the orders take up the full width
- Mobile · The queue becomes a bar at the top that shows which order you’re on (e.g., #2618 (1 / 10)), and two large buttons let you jump to the previous and next orders
What’s listed for each item?
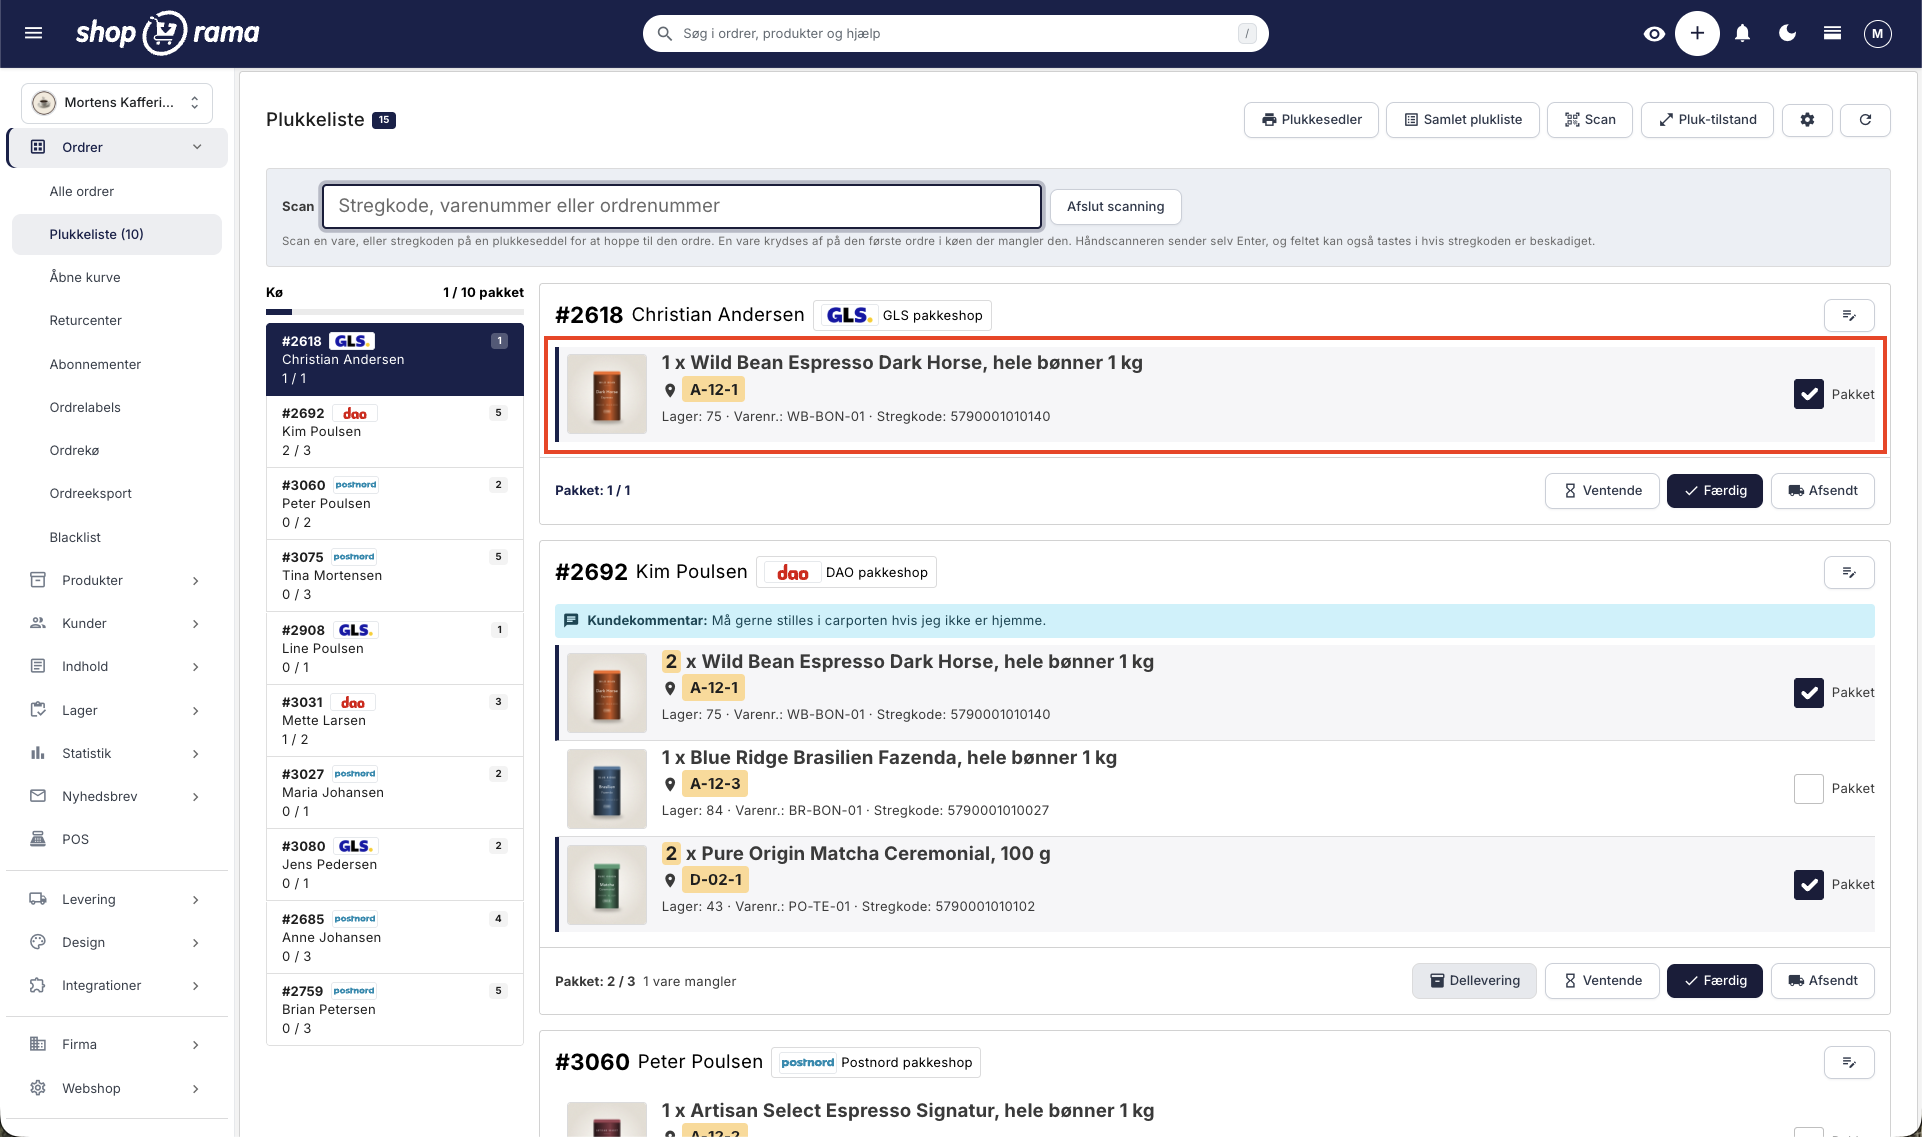
Items are sorted by shelf location, so you can go through the list from top to bottom and follow your usual route through the warehouse. Items without a location are at the bottom. Each item has its own line, and from left to right you’ll see:
- Product image · so you can recognize the item without reading the name
- Quantity · highlighted when more than one unit is needed
- Product name and variant · e.g., size or color
- Shelf location · marked with a pin symbol so it’s easy to spot
- Item number (SKU) and barcode (GTIN)
- Current stock level · so you can see right away if the item should be on the shelf
- Packed checkmark · your own indicator that the item is in the box
If the order includes a customer comment, responses to additional fields at checkout, or an internal note, it appears at the top of the order in a colored block. This is exactly the kind of information that gets overlooked when it’s buried at the bottom of an order.
Check it off as you pick
Check the “Packed” box when the item is in the box. At the bottom of the order, a line counts up, e.g. , “Packed: 2 / 3,” and at the top of the queue, it shows how many of the orders on the page are completely finished.
The checkmarks are saved immediately in your shop. In practice, this means three things:
- If you’re interrupted, close the tab, or reload the page, your work is still there
- If there are two of you packing, you’ll be working from the same list. However, the page doesn’t refresh automatically, so click the refresh button at the top to see what the other person has checked off
- You can start on your computer and continue on your tablet out in the warehouse
The checkmarks are automatically cleared as soon as the order leaves the “In Progress” status—that is, when you set it to “Ready,” “Pending,” or “Shipped.” If you send a partial shipment, the checkmarks are only removed for the items that were packed, while the rest of the order retains its checkmarks. You don’t need to clean up after yourself.
Scan the items instead of clicking
The “Scan” button at the top opens a scan field. After that, you don’t need to use the mouse: pick up an item, scan it, and the system will automatically find the order on the page that’s missing that specific item and check it off. If two items are needed, scan twice.
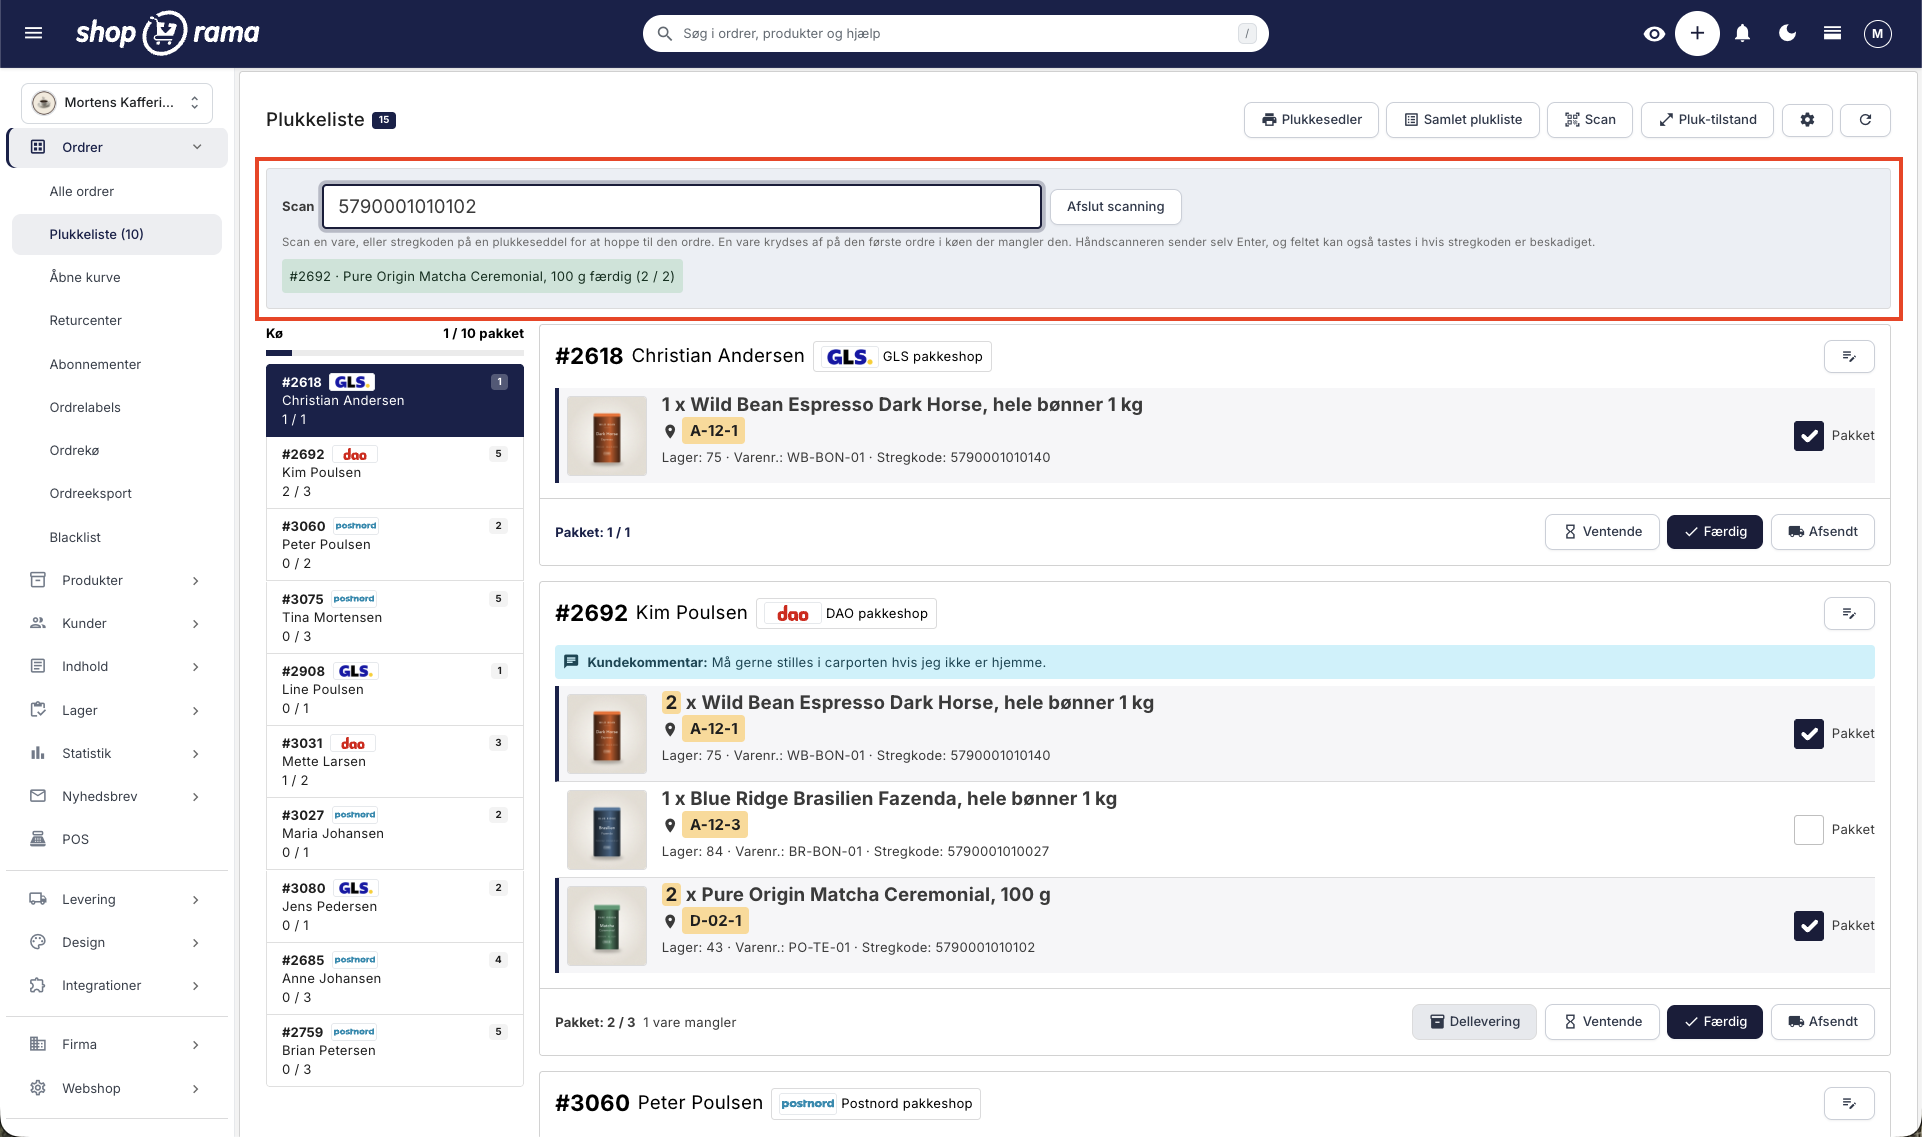
If you scan the barcode on a printed picking slip, the page jumps directly to that order. This means you can take a slip from the stack and have the order on the screen without letting go of the scanner. Read the full guide in “Scan the items on the picking list.”
Print Picking Lists
There are two print buttons at the top, and they generate two different documents:
- Picking slips · one slip per order, sorted by shelf location, with a barcode for the order number. The slips are grouped together on the sheets so that short orders share a sheet
- Combined Picking List · all items from all orders combined into a single list, sorted by shelf location. You make one trip through the warehouse instead of one trip per order
The picking slip does not include prices, sales tax, total amount, payment method, email, or phone number. It can therefore be left out on the packing table. See what the two documents contain in “Print Picking Slip” and “Combined Picking List.”
The four buttons on the order
Once the order is packed, you complete it at the bottom of the order card. “Pending,” “Complete,” and “Shipped” work without reloading the page, so you stay where you are in the queue. “Partial Shipment” opens the packing page and returns you to the same page afterward.
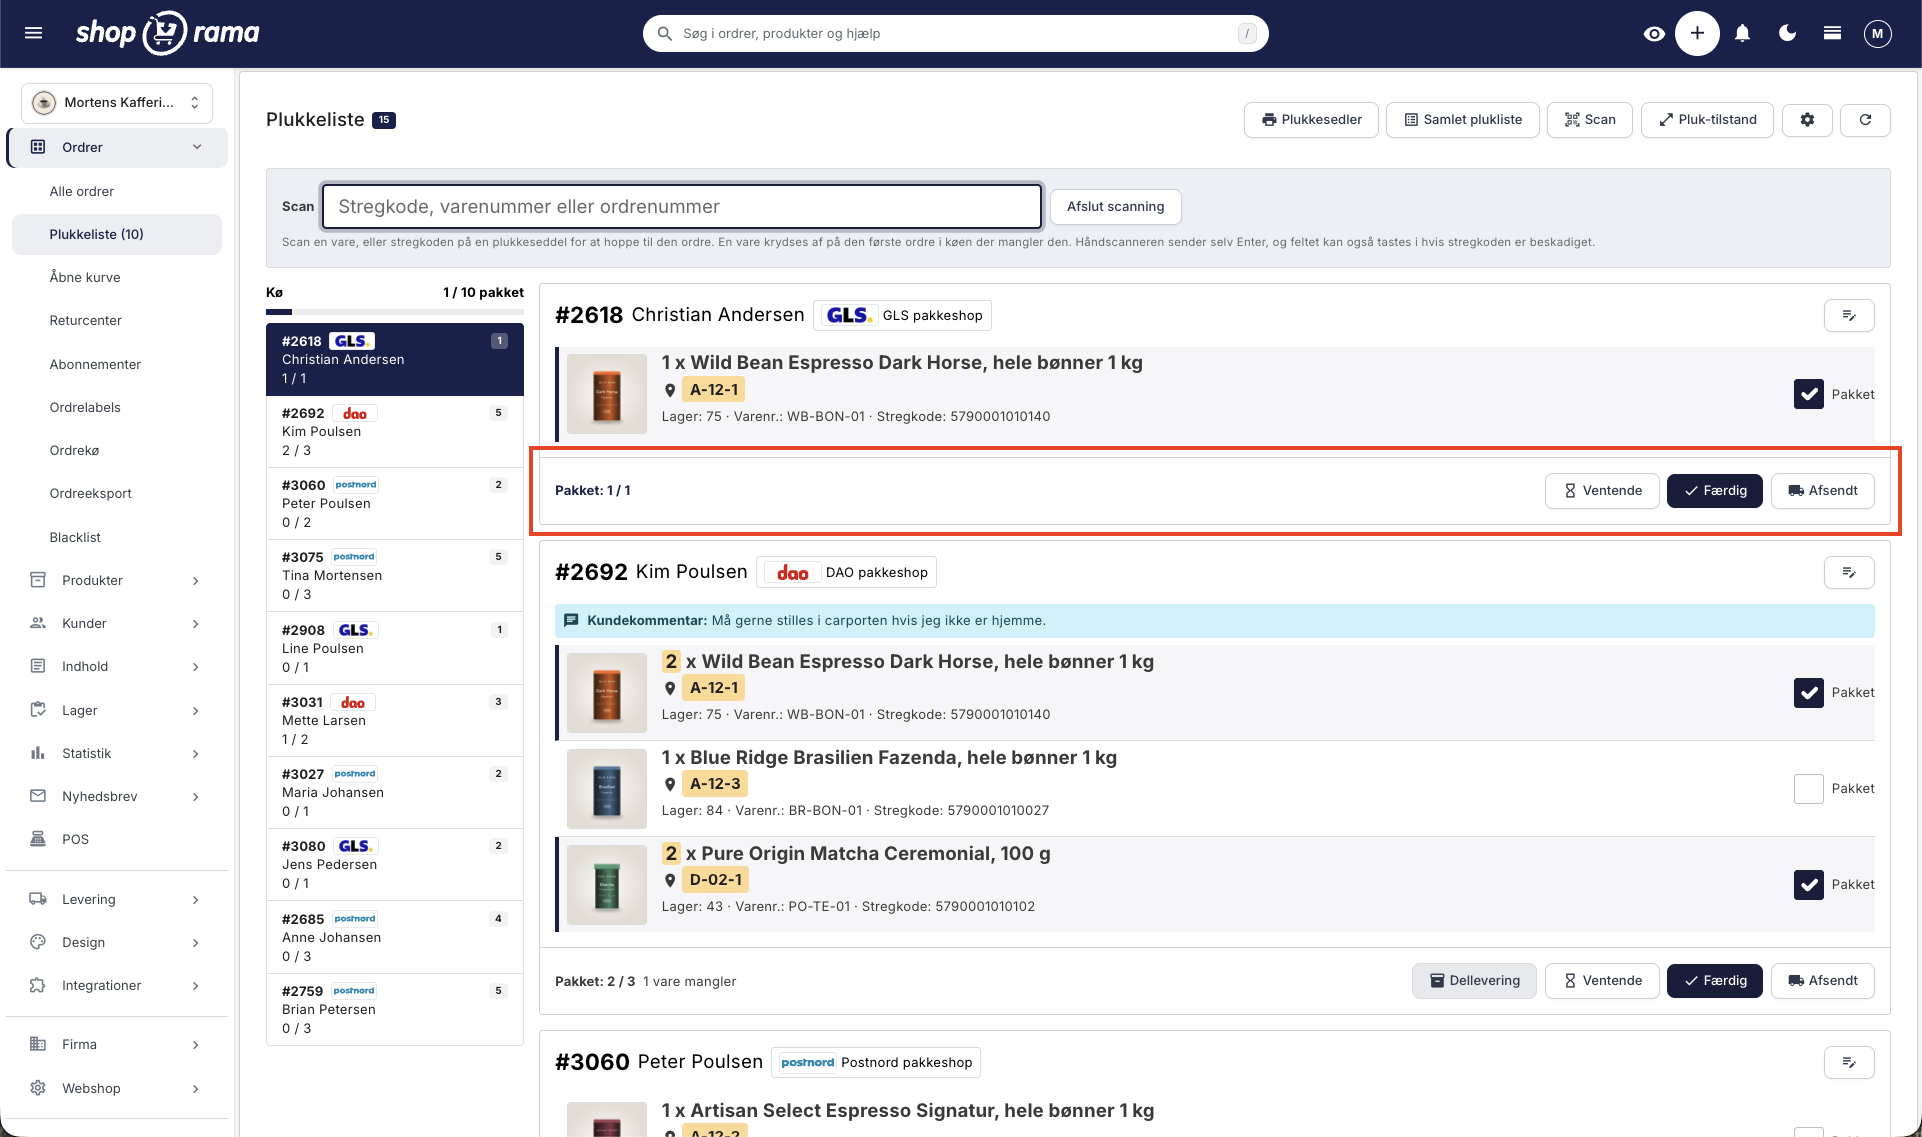
- Partial Shipment · Ship what you have now, and the rest later. The button only appears when there is more than one item left to ship
- Pending · The order must wait, e.g., because an item is missing. It receives the “Pending” status, is removed from the picking list, and no email is sent
- Ready · The order is packed and ready for shipment. It receives the “Ready” status and sends no email
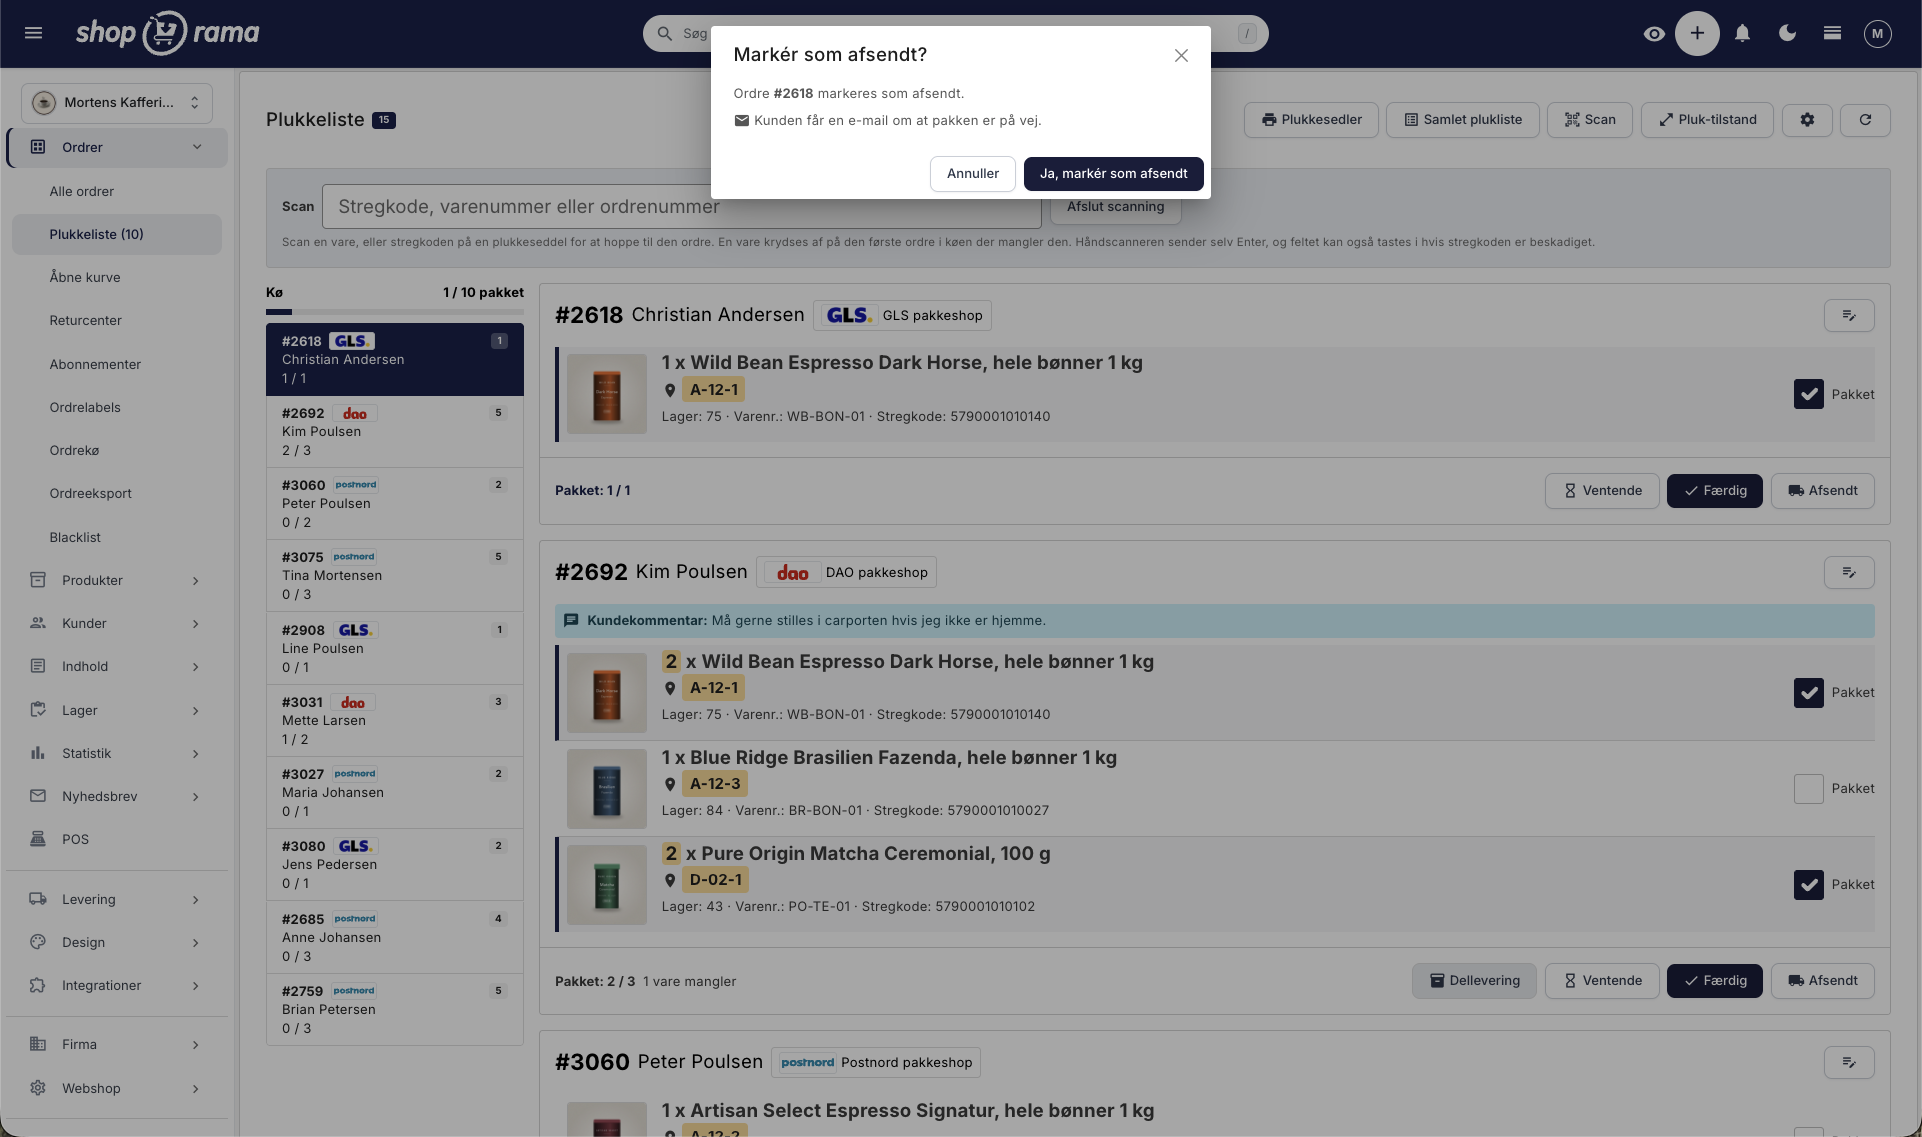
- Shipped · The package has left the warehouse. This is the only button that sends an email to the customer, and you’ll be asked to confirm first
Ship only part of the order
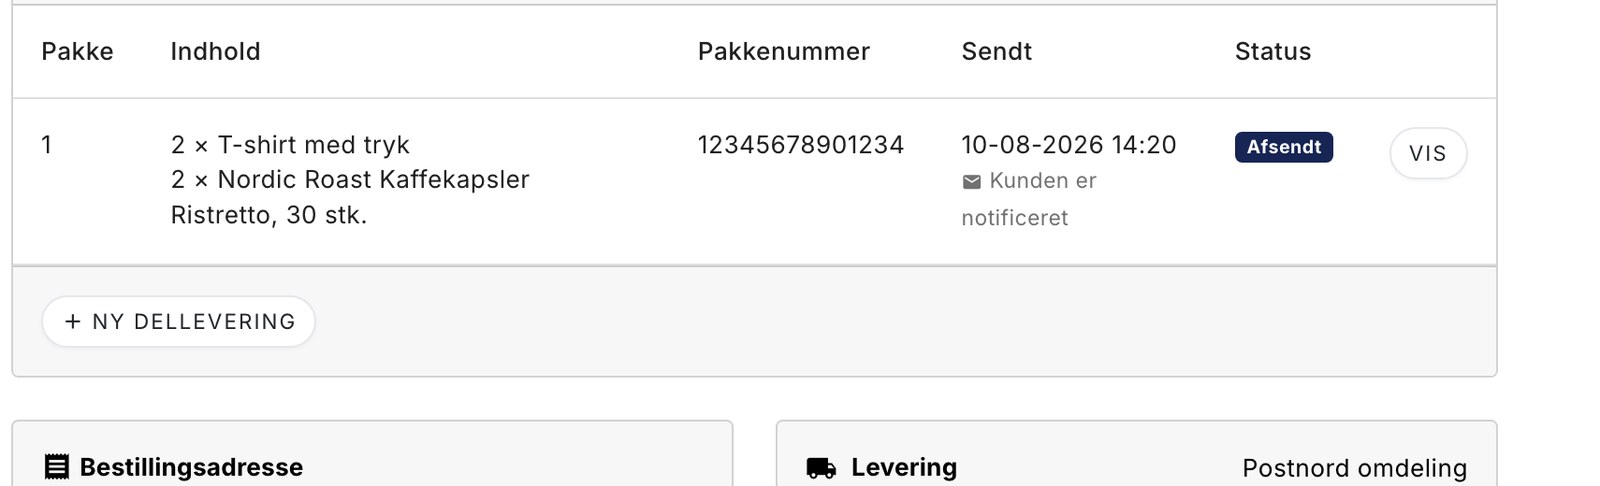
If an item is out of stock, the rest of the order doesn’t have to wait. Partial shipping takes you to a page where you select what to include in the package. The rest remains on the order, and you can see the stock level for each line item as you make your selection.
If an order has partial shipments, the picking list shows only the items that still need to be shipped, and it indicates how much has already left the warehouse. If you’ve saved a package without shipping it, the items will remain on the list with a warning that they’re already in a package, so you don’t pick them again. Read more in Partial Shipments: Ship part of the order now and the rest later.
Picking List Settings
The gear icon at the top opens the settings. These apply to the entire store, not just your own user account.
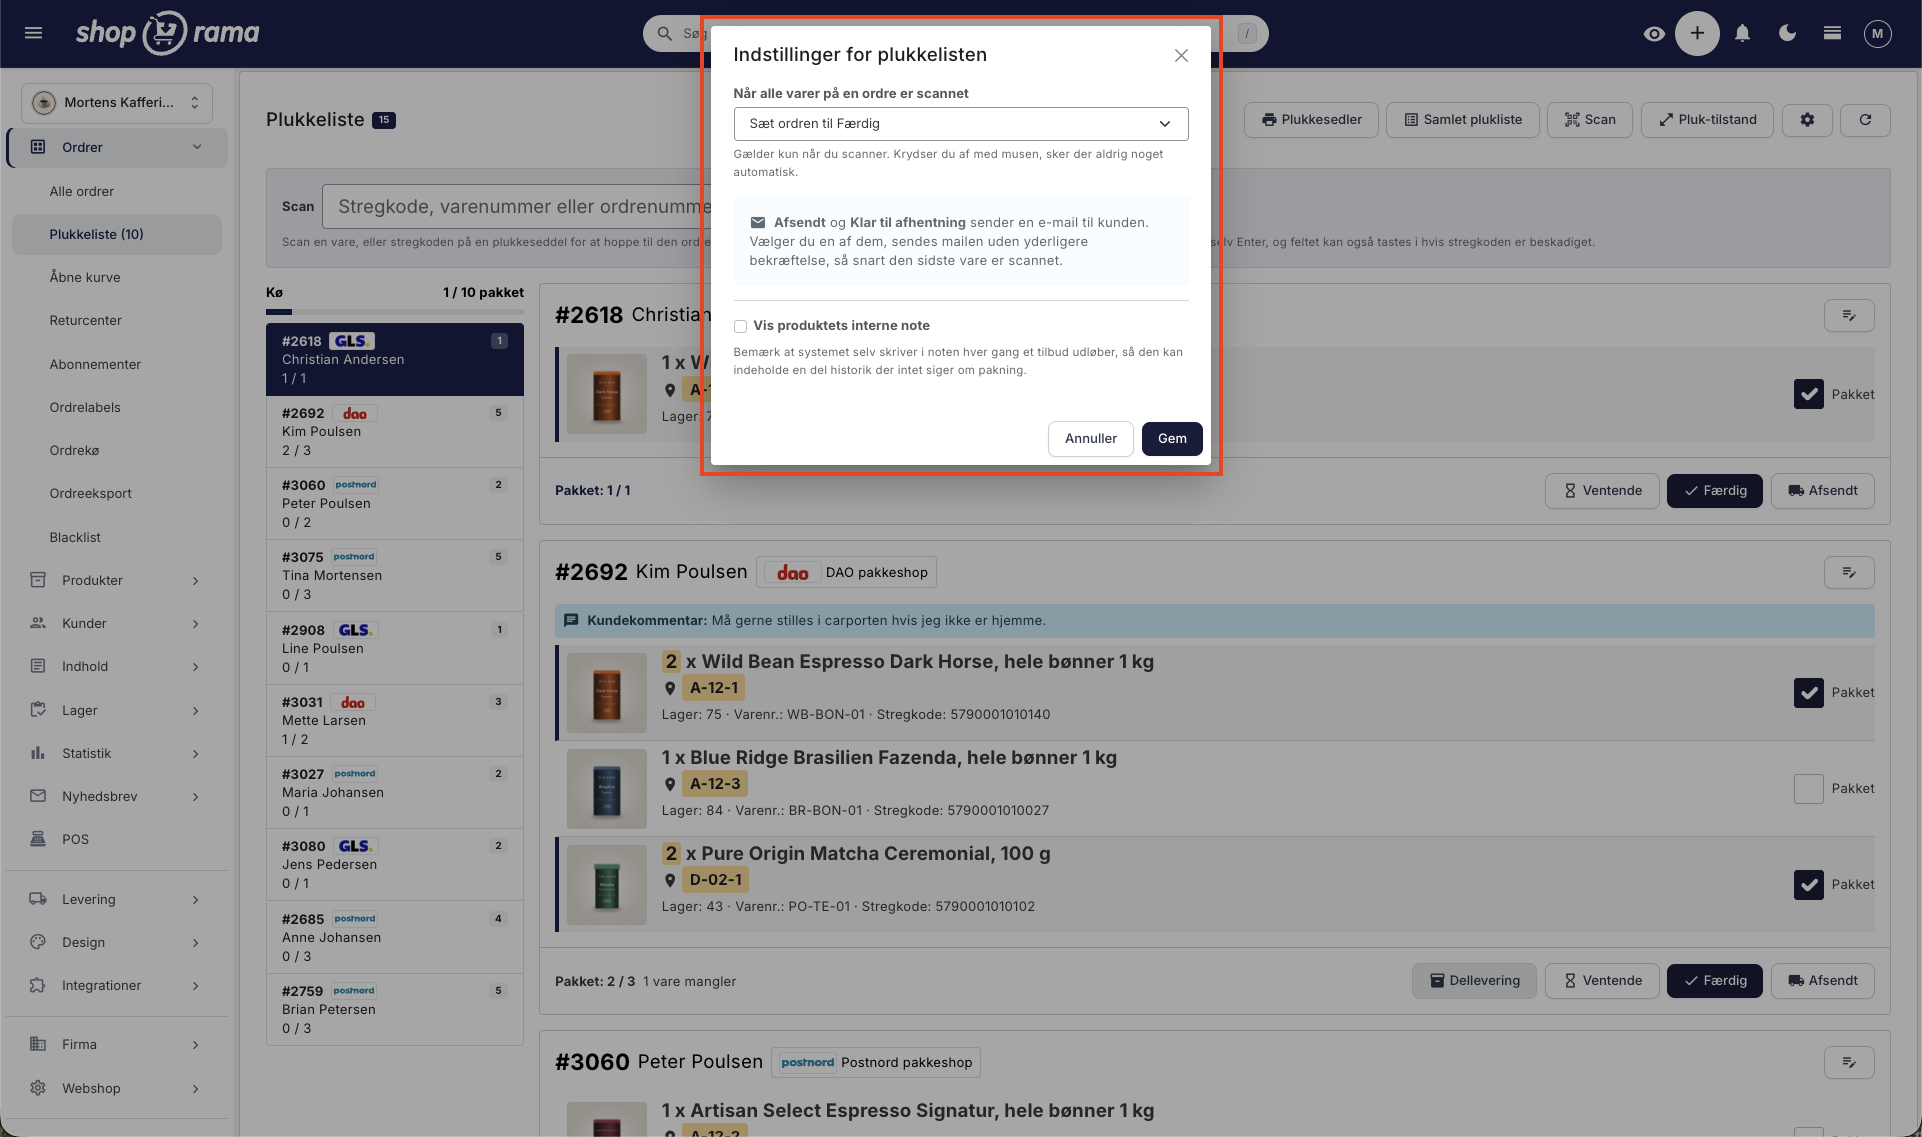
- When all items on an order have been scanned · you can let the system automatically set the order to “Complete,” “Ready for Pickup,” or “Shipped,” or you can choose not to. This automatic action applies only when you scan. If you check the box with the mouse, nothing will ever happen automatically
- Show the product’s internal note · the note from the product is displayed on the item line. Please note that the system automatically adds text to the note—for example, when an offer expires—so it may contain historical information that has nothing to do with packing
If you select “Shipped” or “Ready for Pickup”
The customer’s email will be sent as soon as the last item is scanned, without you being asked again. That’s the whole point of the setting, but it’s worth knowing before you enable it.
Picking Mode: Only the picking list on the screen
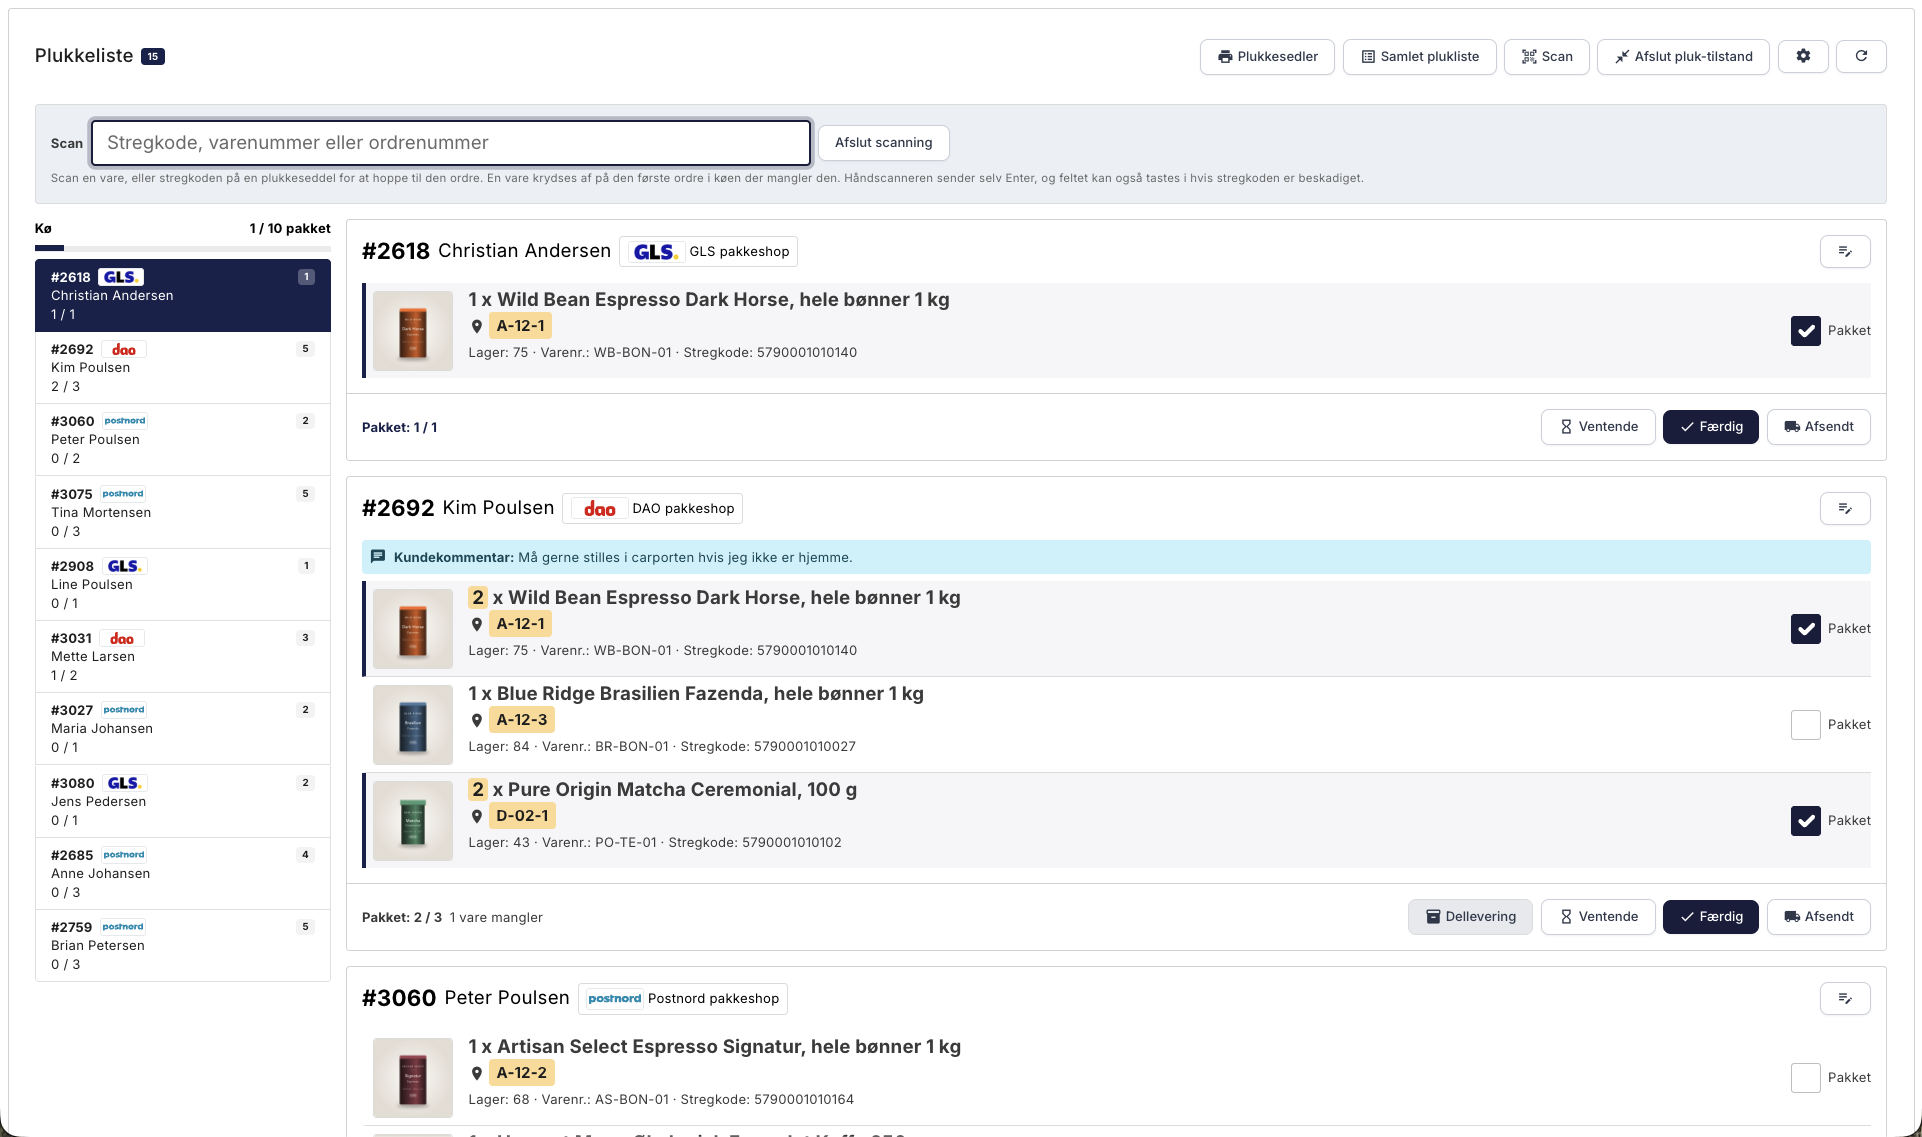
The “Picking Mode” button hides the admin menu and the top bar, so the entire screen is the picking list. This is especially useful on a tablet or a screen at the packing table. You exit by tapping the “Exit Picking Mode” button in the same place.
Install the picking list as an app
The picking list can be added to the home screen as a standalone app. It will then open in full-screen mode without the browser’s address bar, and you can walk around the warehouse with it.
iPhone and iPad (Safari)
- Open the picking list in Safari
- Tap the Share button—the square with the up arrow
- Scroll down and tap “Add to Home Screen”
- Give the app a name, such as “Pick, ” and tap “Add”
Android (Chrome)
- Open the pick list in Chrome
- Tap the three dots in the top-right corner
- Tap “Install app” or “Add to home screen”
- Confirm by tapping “Install”
Computer (Chrome and Edge)
- Open the drop-down menu in Chrome or Edge
- Click the install icon in the address bar
- Click Install. The app will open in its own window and can be launched from the desktop
Batch Management During Picking
If you use batch management, you can select which batch the items are picked from directly on the item line. The system suggests the batch that expires first, so items with the shortest shelf life are picked first, and batches that have already expired cannot be selected. You can split an order line across multiple batches if there isn’t enough in a single batch. The selection is saved when you mark the order as Pending, Complete, or Shipped, and carries over to the inventory posting. Read more in Inventory Postings and Batch Management.
Tip: Assign a shelf location to all items
The picking list and both print documents sort by shelf location, so you follow the same route whether you’re looking at the screen or the paper. Without locations, the order becomes random, and you’ll end up going back and forth in the warehouse. Learn how to get started in “Warehouse Locations.”
Frequently Asked Questions
What is a picking list?
A picking list gathers all the orders waiting to be packed onto a single page. It shows which items are included in each order, how many, and where they are located in the warehouse, and you check them off as you place them in the box. The term comes from warehouse work: first you pick the items, then you pack them.
Why can’t I see a specific order on the picking list?
The order must be paid for and marked as “In Progress.” If it hasn’t been paid for yet, or if it’s marked as “New,” “Pending,” or “Ready,” it won’t be in the queue. If a package has already been shipped for the order, the list only shows what’s missing, and if all the remaining items are out of stock, the order is removed from the queue until they’re back in stock.
Can two of us pack at the same time without picking the same items?
Yes. The checkmarks are shared across the entire store, so you’re working from the same list, whether you’re sitting at separate computers or walking around with your own tablets. The page doesn’t refresh automatically, so use the refresh button to see your coworker’s checkmarks. Orders aren’t locked to a specific person either, so you’ll need to agree among yourselves who takes what—for example, by splitting the queue between you.
Could I accidentally send an email to the customer by pressing the wrong button?
No. Of the four buttons, only “Sent” sends an email, and it always opens a window where you must confirm. “Pending,” “Done,” and “Partial Delivery” do not send any message to the customer from the picking list itself. The only exception is if you’ve intentionally enabled the automatic feature in the settings.
Does the customer notice anything while we’re working through the list?
No. Checking the box, changing the status to “Pending,” and changing the status to “Complete” are internal actions and do not trigger any notification for the customer. The customer will not hear from you until the order is marked as “Shipped,” and this is the same email you send when shipping from the order list.
What should I do if I can only find some of the items?
Use “Partial Shipment” and ship what you have. The rest will remain on the order, and the order will stay in the picking list until the last item has been shipped. If you can’t pack anything at all right now, set the order to “Pending” instead, so it doesn’t sit in the queue taking up space.
How many orders can the picking list handle?
The queue can hold up to 2,000 orders and displays 10 at a time. The number next to the header shows the entire queue, so you can always see how many orders are left for the day, no matter which page you’re on. If you have more than 2,000 orders in progress at once, there’s a problem other than the picking list.
Can I see afterward who packed a specific order?
No. The system records who checked off each item and when, but these records are cleared once the order leaves the picking list. Picking status is a tool for the current packing process and not an audit trail. If you need to document who processed an order, that information must be recorded elsewhere.
Can I get statistics on how long a picking run takes?
No. The picking list tracks what has been picked and what is missing, but it does not measure time or generate a report on picks per hour. If you want to track efficiency, you’ll have to do so outside of this feature.
What happens if I click “Done” before everything is checked off?
The order’s status will change as usual. The checkmarks are there to help you, not to block you, and the button shows how many items are missing. That’s how it should be: some days you pack faster than you can click, and the system shouldn’t get in the way.
Related articles
Warehouse locations
Learn how to organize your inventory across multiple locations in Shoporama.
Order queue
Guide to the order queue in Shoporama. See the status of automatic order actions such as capture, invoicing and stock pull, and learn how to manage...
Order labels
Guide to order labels in Shoporama. Create color-coded labels to organize and categorize your orders and set up automatic allocation based on...
Split Delivery: Ship part of the order now and the rest later
Can't you ship the entire order at once? With split shipping, you ship what you have in stock, and the rest will be shipped when it arrives. The...
Scan the items on the picking list
Pick orders using a standard barcode scanner. You scan the item, and the system automatically finds the order that needs it, counts the quantity,...
Print the picking slip and the consolidated picking list
The two printed documents from the picking list: one picking slip per order with a barcode, and a consolidated picking list where the items from...
Warehouse Placement: Assign a shelf location to your items
The "Warehouse Location" field indicates where the item is physically located. The picking list and both print documents are sorted by this field,...
Related features
Fulfillment
Fulfillment covers the entire order process from order to delivery. Read about fulfillment models, 3PL and order management.
The picking list has been redesigned: scan the items, print the picking slip
The picking list can now scan items, print picking slips and a consolidated picking list, and it remembers what you've checked off. The orders are...
Partial delivery: Send what you have now, and the rest when it arrives home
Storage hotel
A warehouse stores, packs and ships your goods for you. Learn about the pros, cons, prices and when it makes sense for your webshop to use self...
Pick list
Print picking lists directly from Shoporama. Streamline your warehouse work with an overview of orders, products and batch numbers in one clear view.
3PL
3PL is the outsourcing of warehouse management and shipping to an external partner. Learn what 3PL is, the pros and cons, and when it makes sense...
Send part of the order now and the rest later
Was an item missing from the shelf? Now you can ship what you have, and the rest will be shipped when it arrives. One order, one invoice, and the...
Your first order: pack, ship, and collect payment
Manage your first order in Shoporama: order status, picking list, partial shipments, shipping labels, payment refunds, and unpaid orders.