Delivery Note Templates: Create Your Own Layout
Create your own shipping labels in Shoporama. Select the form sections, sender, recipient, item lines, and sales tax; save the template; and reuse it every time you print labels. The shipping label itself is provided by the shipping company.
When you send a package, there are two pieces of paper involved. The shipping label is attached to the outside of the package and is provided by the shipping company. The packing slip goes inside the package, and you decide what goes on it. In Shoporama, you create the packing slip using a simple builder, save it as a template, and reuse it every time you pack a shipment.
You’ll find this feature in the menu under Store → Shipping → Print Labels. At the top of the page are the buttons New Label, New Packing Slip, and Packing Slips. The last one shows an overview of all your saved templates.
What types of templates are available?
The short answer is: one. There are no templates for the shipping label itself, only for the packing slip. Templates under “Print Labels” are therefore always packing slips—the slip you place inside the package. The three documents in a shipment are created in three different places:
- The shipping label (the sticker on the package) is generated by the shipping carrier and is returned as a finished PDF. The layout, barcodes, and sorting codes are the shipping carrier’s responsibility, so you cannot set those up yourself.
- You createthe packing slip for labels without an order here and save it as a named template that you can reuse.
- You printthe packing slip or invoice for an actual order from the order overview. It comes from your theme, not from here. If you ship the order in multiple packages with a partial shipment, each package has its own packing slip listing only the items in that package, and you print that from the order.
You create the shipping label itself in “Print Shipping Labels Without an Order,” which is the natural companion to this article.
How to Create Your First Packing Slip
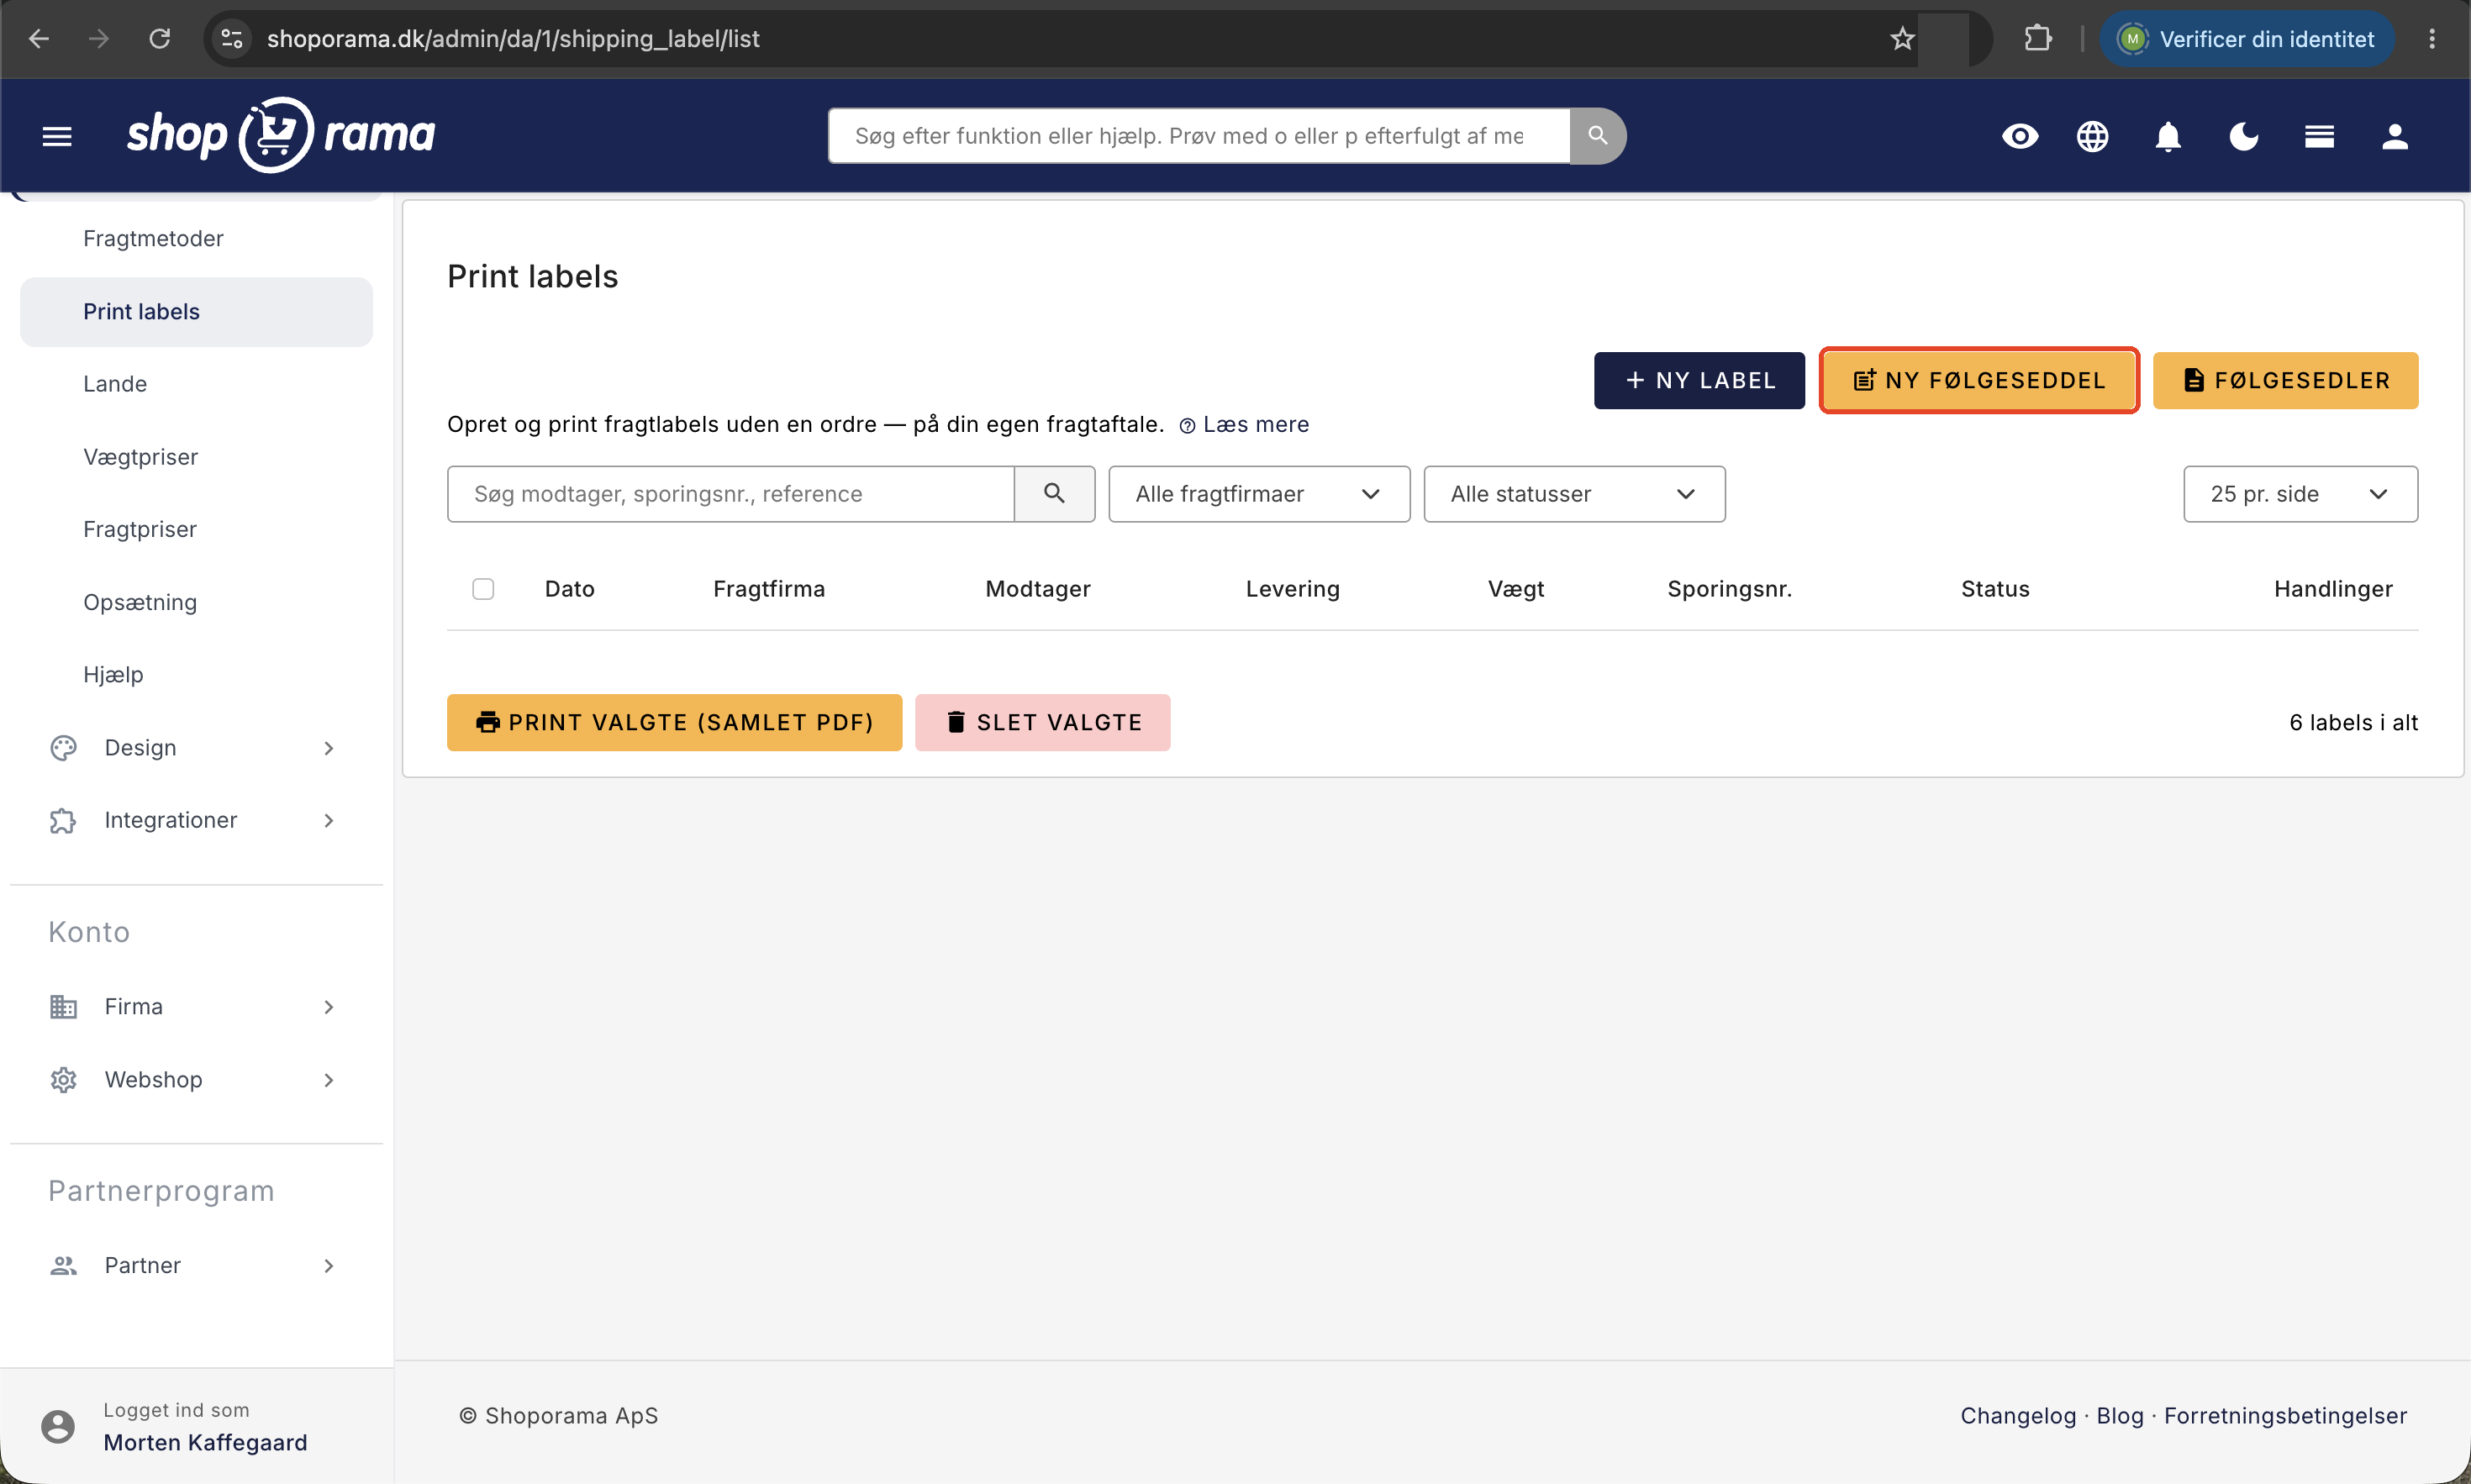
- Go to Store → Shipping → Print Labels and click New Packing Slip.
- Give it a Name, for example, “Standard packing slip.” The name is for your own reference only. If you don’t enter anything, it will simply be called “Packing Slip.”
- Select a Document Title. This is the heading in the top-right corner of the slip. The default is “Packing Slip,” but “Package Slip” or “Return Slip” work just as well.
- Toggle the sections on and off as needed, and edit the fields. You can leave most of them as is, since the store’s own information is already filled in.
- Click Save Delivery Note. If you want to see the result right away, click Save and Print instead, which saves the note and opens it in a print dialog.
The sections: what you can enable and disable
On the left side under “Show Blocks,” check the boxes next to the sections of the slip you want to include. If you uncheck a box, the entire block disappears:
- Logo displays the store’s logo in the top-left corner. If you don’t have a logo, the sender’s name appears as text instead.
- Sender displays the name, address, ZIP code, city, business registration number, email, and phone number.
- Recipient displays the name, address, address line 2 (if applicable), ZIP code, city, and country.
- Date displays the date the invoice is printed.
- Shipping/Tracking displays the shipping method and tracking number in a small gray box. The box is skipped if both fields are empty.
- Totals adds the columns “Unit Price” and “Amount” to the item table, plus a summary with “Excl. VAT,” “VAT,” and “Total.”
- "Note " displays your free-text note in a highlighted box.
- Return Policy displays the return policy text in small font at the bottom.
- Footer displays a centered line at the very bottom, typically a thank-you message for the order.
On a new packing slip, all blocks are enabled except for Totals. This is intentional: many stores do not want prices included in the package because, for example, it is being sent as a gift or a product sample.
The fields you can fill out
Sender
This section includes Name, Business Registration Number (CVR), Address, ZIP Code, City, Phone, and Email. The fields are pre-filled with the store’s own business information, so you usually don’t need to change them. Edit them only if you want to send on behalf of someone else, for example, using a different company name.
Recipient
The recipient is filled in automatically when you print the packing slip from a label. Only fill in the fields here if the slip is always going to the same recipient, such as a regular business customer. At the top of the block, there is a search field: Search customers and previous orders. Type at least two letters, click on a suggestion, and the name, address, ZIP code, city, and country will be filled in for you.
Shipping and Reference
Under “Shipping / Reference,” you can enter a default shipping method and a reference, which will appear in the top-right corner below the date. You cannot enter the tracking number yourself, and that’s an advantage: it’s automatically filled in when the shipping label is printed, ensuring it always matches the correct package.
Item lines and sales tax
The item table has four columns: Item No., Quantity, Description, and Unit Price. Click Add Line to add another row, or click the trash can icon to remove one. Empty lines are not saved, and the amount per line is automatically calculated as the unit price multiplied by the quantity. Above the table, check the box next to “Prices include VAT” if your prices already include VAT, and enter the VAT rate as a percentage (default 25). Prices and totals are only displayed if the “Totals” block is enabled.
Texts
At the bottom, there are three free-text fields: Note, Return Policy, and Footer. The Return Policy field is pre-filled with a standard statement about a 14-day return policy, and the Footer field with a thank-you message and the store’s name. Edit them to match your own terms and conditions and your tone.
Paper Sizes
The packing slip is formatted for A4 with a 14 mm margin all around, and one slip is printed per page. If you print multiple copies at once, they’ll appear as a single document with page breaks between them. The actual printing takes place in the browser’s print dialog, so that’s where you select the printer and adjust the scaling if needed.
The paper size for the shipping label itself is controlled elsewhere, under Store → Shipping → Settings. For PostNord, you can choose between Label, A4, and A5 there. If you have a label printer, select “Label”; if you’re printing on regular paper, select “A4” or “A5.” DAO labels are generated in the standard label format (150 × 100 mm), and GLS provides the label as a PDF based on your specific agreement.
How to use the template when printing
- From the builder: “Save and Print” saves the template and immediately opens it in a print dialog. Perfect while you’re fine-tuning the layout.
- From the Packing Slips list: The “Print” button opens that specific template. If you want to print multiple copies, check the box and click “Print Selected”; they’ll be printed as a single document with one slip per page.
- From a label: The “Print Delivery Note” button in the “Print Labels” overview opens a delivery note where the recipient, reference, and tracking number are automatically retrieved from the label. Here, the default setup with your company information as the sender is used, not one of your saved templates. If you want to use your own layout, print from the Packing Slips list.
The print window opens as a separate window with a dark blue bar at the top that says “Print ” and “Close.” The print dialog box pops up automatically when the window loads, and the bar never appears on the printed page.
Keep track of your templates
The Delivery Notes overview shows Name, Last Modified, and a column labeled Actions, with the most recent change at the top. Next to each row, you can click Edit to reopen the builder, "Print " to open the print window, the copy icon to clone the template (the copy will have the same name plus "(copy)"), or the trash can to delete it after confirmation.
If you have many templates, you can search by name in the “Search Delivery Note” field and select 10, 25, 50, or 100 per page. The checkbox at the top of the table selects all rows, and " Delete Selected " clears multiple rows at once.
Why is it worth the time?
The packing slip is one of the few places where you can speak directly to the customer after the purchase, without incurring postage or advertising costs. A nice note with your logo, a brief thank-you, and a clear return policy make the package look more professional and eliminate a large portion of the “how do I return this?” emails that would otherwise end up in your inbox. With the clone feature, you can have one template for regular packages, one for B2B orders with item numbers and totals, and one for return shipments, so no one in the warehouse has to start from scratch with the text. This builds customer loyalty with very little effort.
If, on the other hand, the paper included in the package needs to look right for orders from the online store, check out “Can I make the invoice print-friendly?”
For those who are tech-savvy
- The entire setup is saved collectively within each individual template. If you change one, it doesn’t affect the others, and a clone is an independent copy from the moment it’s created.
- Line items and sales tax are calculated on the server before the receipt is displayed. If “Prices include sales tax” is enabled, the amount excluding sales tax is calculated as the total divided by 1 plus the sales tax rate; otherwise, sales tax is added on top. If the rate is set to 0 or lower, it reverts to 25%.
- Prices are entered as free text but are displayed with two decimal places in the “Amount” field and in the totals. Both periods and commas function as decimal separators.
- Delivery slips for actual orders come from your theme, from the file ` printed_invoice.html ` and, if applicable, ` printed_invoice_frame.html`. They have nothing to do with the templates here.
Frequently Asked Questions
What exactly is the difference between a packing slip and an invoice?
The packing slip is the slip included in the package that lists what was shipped and who it’s from. The invoice documents the sale and the sales tax. The packing slip here is not an accounting document and does not replace the invoice. If you need a document for your books, use the invoice for the order.
I didn’t fill out the sender fields. Will the slip be blank then?
No. If the sender name field is left blank, Shoporama automatically retrieves the store’s business information: name, address, ZIP code, city, business registration number, email, and phone number. You should only edit these fields if you intentionally want to ship under a different name or from a different address.
How do I include the tracking number on the packing slip?
The tracking number cannot be entered into the template. It is automatically added when you print the packing slip from a specific label under “Print Labels,” along with the recipient’s information and the label’s reference. Remember to have the “Shipping/Tracking” section enabled; otherwise, the field will not appear.
Can I change the colors, font, or paper size on the packing slip?
No, the design is fixed, and the slip is formatted for A4. You control the content: which sections are displayed, the document title, the text, the item lines, and whether prices and totals are included. If you want the printout to look completely different, you’ll need to look at the order printout from the theme.
Why does it show today’s date instead of the order date?
The date block shows the day the invoice is printed. The templates are for invoices without an underlying order, so there is no order date to reference. If you need to include a different date, you can enter it in the “Reference” field or in the notes.
How do I display prices including sales tax?
Enable the Totals block, check the box for “Prices include VAT,” and enter the prices including VAT in the Unit Price column. Specify the VAT rate, typically 25. At the bottom, “Excl. VAT,” “VAT,” and “Total in kroner” are displayed so the breakdown is clear.
Will anything happen to my labels if I delete a packing slip?
No. Templates and labels are completely separate. If you delete a template, only the setup is removed, and your labels, tracking numbers, and PDFs remain unaffected. Conversely, cleaning up your labels won’t affect the templates either.
The print window won’t open. What should I do?
The packing slip opens in a new window, so it’s almost always your browser’s pop-up blocker that’s getting in the way. Allow pop-ups for the admin panel and try again. If you’re still having trouble, email support@shoporama.dk with a screenshot.
Related articles
Print shipping labels without an order
Create and print shipping labels without first placing an order, using your own account with PostNord, GLS, or DAO. Create labels for multiple...
Print-friendly invoice
Guide to making your invoice print-friendly with a print stylesheet in your Shoporama theme.
Print PostNord parcel labels from Shoporama
Guide to setting up PostNord integration and creating parcel labels directly from the Shoporama admin.
Følg levering og pakkeshop-afhentning i Shoporama
Shoporama viser leveringsstatus direkte i ordrelisten, både for pakkeshop og levering til adressen. Se om pakken er undervejs, klar til afhentning,...
Handle returns
Guide to Shoporama's returns center - handle returns, create credit notes, and manage customer return requests.
Manage your orders in Shoporama
Guide to managing orders in Shoporama - from receiving to shipping and status updates.
Split Delivery: Ship part of the order now and the rest later
Can't you ship the entire order at once? With split shipping, you ship what you have in stock, and the rest will be shipped when it arrives. The...
Related features
Pick list
Print picking lists directly from Shoporama. Streamline your warehouse work with an overview of orders, products and batch numbers in one clear view.
Shipping options
Set up shipping with PostNord, GLS, DAO, DHL and Shipmondo. Parcel shops in checkout, tracking, free shipping and weight-based shipping calculation.