Partner Ads setup step by step
Detailed guide to setting up Partner Ads in Shoporama: feed, tracking, program type, country, API key and auto cancel on return.
This guide walks you through the entire Partner Ads setup process in Shoporama, field by field. You’ll set up both your product feed and tracking correctly, and then enable automatic cancellation for returns and differentiated commission rates per brand. If you’re completely new to Partner Ads, start with “Set Up Partner Ads in Shoporama: Get Started” for an overview.
Where can I find the settings?
All Partner Ads fields are located under Account → Webstore → General in the left sidebar. On that page, you’ll find the tab labeled “Feeds.” Within that tab, there are several sections (Google Shopping, Pricerunner, Klaviyo, etc.). Scroll down to the “Partner Ads” section. This is where all the setup takes place.
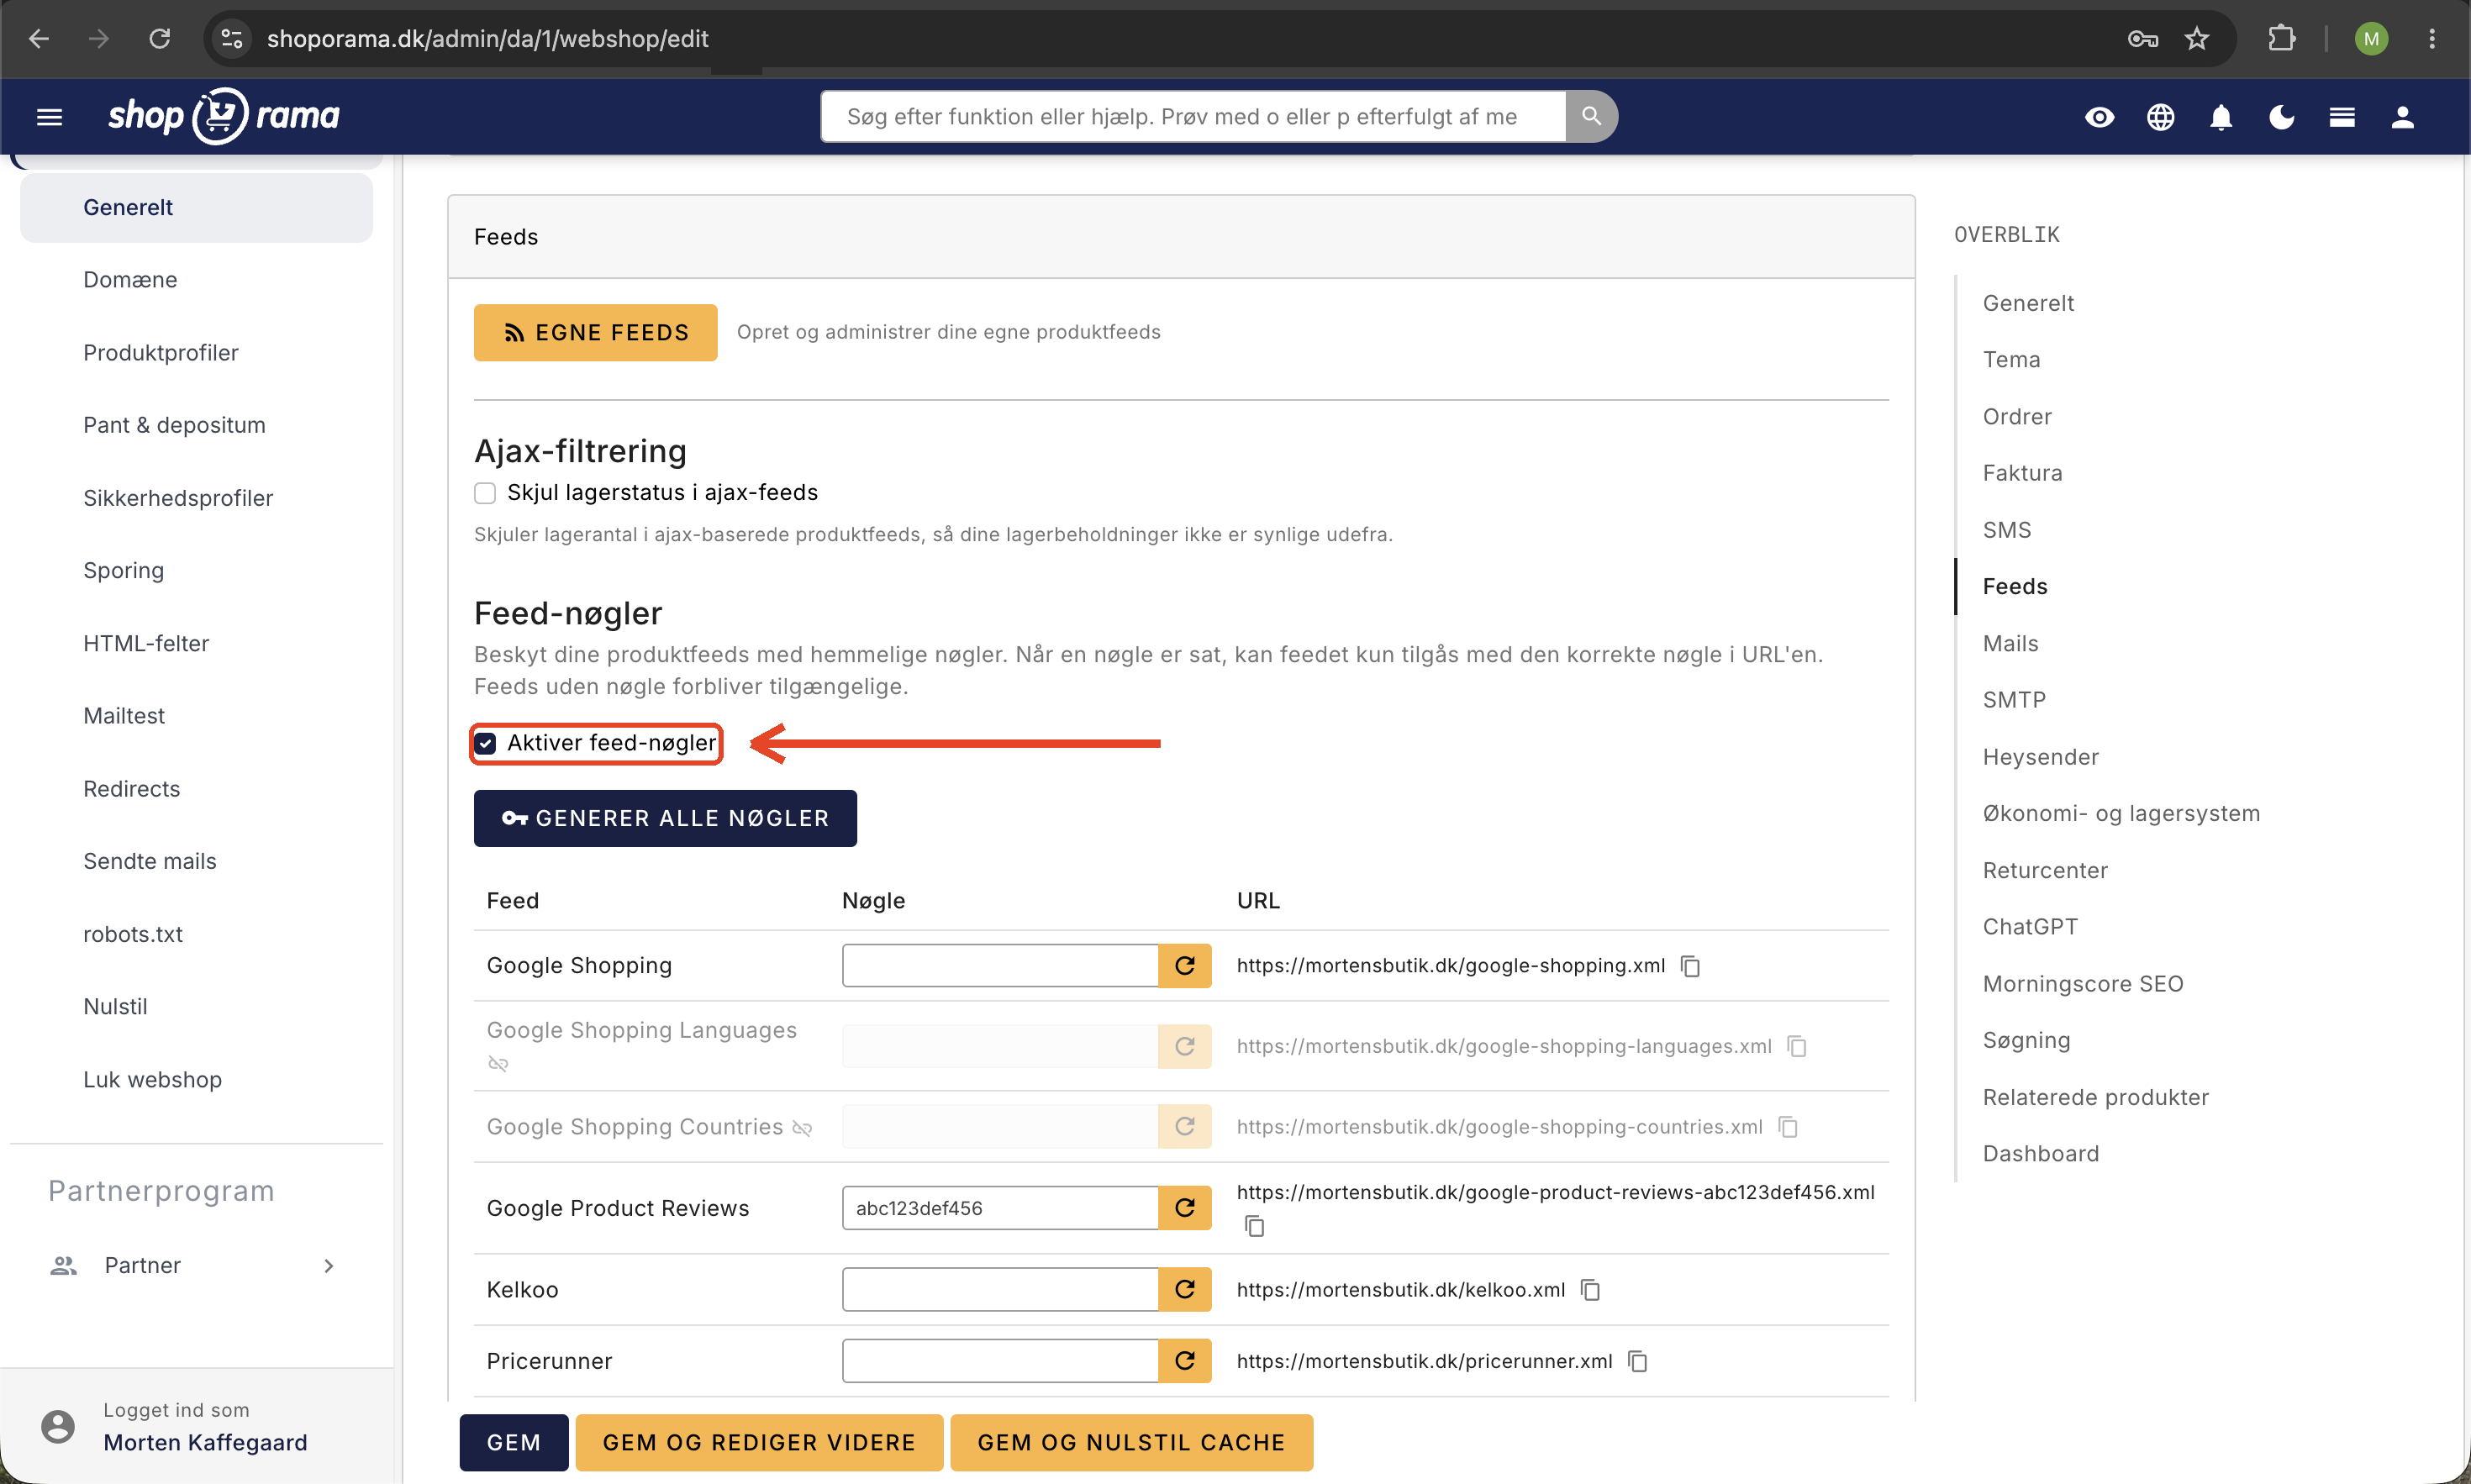
Note: Previously, the Partner Ads settings were located under a separate menu item called “Feeds.” That menu item has now been removed, and all fields have been consolidated on the Webshop page. You can find your own custom product feeds under Products → Product Feeds.
Prerequisites
- An approved advertiser account with Partner Ads
- Your program ID from Partner Ads (make a note of it)
- Determine which program type your agreement covers (Sales or Leads)
- Access to your Shoporama admin with permissions to edit webshop settings
Step 1: Activate the product feed
The product feed is the XML file from which Partner Ads retrieves your products. Follow these steps:
- Check the box next to "Enable Partner Ads feed. "
- Enter your program ID (or affiliate ID) in the “Partner Ads ID (if applicable)” field.
- Click Save at the bottom of the page.
Once the feed is saved, the feed URL will appear directly below the field, for example , https://dinshop.dk/partner-ads.xml. You must provide this URL to Partner Ads so they can retrieve your products.
Important: The feed is not automatically activated just because you’ve entered a program ID. You must explicitly check the box next to “Enable Partner Ads feed” and save. Without this checkmark, the feed is inactive, and the URL will not return any products.
Step 2: Enable tracking
Tracking records when a customer came from a partner and completed a purchase. It is enabled separately from the feed:
- Check the box next to "Enable Partner-Ads Tracking. "
- Enter your program ID in the “Partner Ads Program ID” field.
- Select Program Type: either Sale (commission per order) or Lead (commission per registered contact). This must match your agreement with Partner Ads.
- Select Partner Ads country: Denmark, Sweden, or Norway. Choose the country that matches your Partner Ads account.
- Click Save.
The tracking sets a cookie on the customer’s device when they visit your store from an affiliate site. The cookie lasts for 40 days and contains the partner ID and the customer’s IP address. When the customer places an order during that period, Shoporama automatically sends the order number and price to Partner Ads.
Step 3: Add API Key and Automatic Cancellation (optional)
If customers return or cancel orders, you’ll usually want the commission refunded as well. This happens automatically if you add your Partner Ads API key and check the relevant boxes:
- Log in to your Partner Ads account.
- Go to “Data Exports / API” on the left-hand side.
- Find the text “Your unique key is” and copy the key.
- Back in Shoporama (same section), paste the key into the "Partner Ads Key" field.
- Check the box next to "Automatically cancel canceled orders in Partner Ads" to reverse the transaction in case of a manual cancellation.
- Check the box next to "Automatically cancel returned orders in Partner-ads" to reverse the transaction in case of a return.
- Click Save.
Step 4: Differentiated Rate Groups (optional)
If you want to set different commission rates per brand (e.g., 8% for one brand and 12% for another), you can enable rate groups:
- Check the box next to "Use differentiated rate groups. "
- Specify a default rate in the "Default rate group" field. This is used when a brand does not have its own rate.
- Click Save.
- Then go to Products → Brands and specify a specific rate group for each brand, where applicable.
Overview of all fields
- Enable Partner Ads feed: activates the product feed.
- Optional Partner Ads ID: Your Partner Ads ID/affiliate ID associated with the feed (typically identical to the program ID).
- Enable Partner Ads tracking: Enables sales/lead tracking.
- Partner Ads program ID: Your program ID used for tracking.
- Partner Ads key: API key for sending cancellation responses.
- Program type: sale or lead.
- Partner Ads country: dk, se, or no.
- Automatically cancel canceled orders: automatically reverses commission when an order is canceled.
- Automatically cancel returned orders: Automatically reverses commission upon return.
- Use differentiated rate groups: Enables different rates per brand.
- Default rate group: standard rate for brands without their own rate.
Verify the setup
- Test the feed: Open the URL (e.g., https://dinshop.dk/partner-ads.xml) in a browser. You should see the XML with your products.
- Test tracking: Create a test link in the Partner Ads portal, click on it, place a test order, and check if the sale appears in your Partner Ads account within a few minutes.
- Check color and size: If your products come in variants, see “Include color and size in the Partner Ads feed.”
Frequently Asked Questions
Where can I find the Partner Ads settings in the new admin panel?
Go to Account → Webshop → General in the left sidebar and scroll down to the “Feeds” tab. The “Partner Ads” section contains all the fields you need. Previously, there was a separate “Feeds” menu item, but it has now been consolidated on the Webshop page.
Is the feed activated automatically when I enter my program ID?
No. You must explicitly check the "Enable Partner Ads Feed" box before the feed becomes active. The same applies to tracking, which has its own separate checkbox. This is the most common mistake during setup.
What is the difference between “Optional Partner Ads ID” and “Partner Ads Program ID”?
For most online stores, it’s the same number. “Optional Partner Ads ID” is associated with the feed, while “Partner Ads Program ID” is used for tracking. In special setups with multiple programs, they may be different, but otherwise, you should enter your program ID in both fields.
Should I choose “Sale” or “Lead”?
Almost all online stores choose “Sale” because the partner receives a commission per completed order. “Lead” is only used if your agreement with Partner Ads is based on, for example, a completed contact form or an account creation, rather than an actual sale. Check the terms of your agreement.
Which countries can I select?
Shoporama supports Denmark, Sweden, and Norway. Select the country that matches your Partner Ads account. If you sell to multiple countries, Partner Ads typically operates on a per-country basis, and you can only link one account per online store.
What happens in the event of a return if I haven’t entered the API key?
In that case, the commission will not be automatically reversed in Partner Ads. You’ll need to log in and cancel the order manually. With the API key and the “Cancel automatically” checkboxes selected, Shoporama will handle this automatically when an order is canceled or returned in the admin panel.
How long after a click is a sale recorded?
The tracking cookie is set for 40 days. If the customer returns and makes a purchase within those 40 days, the partner is credited. After 40 days, the tracking expires, and the sale is not attributed to the partner.
How is the “Default Rate Group” field used?
Once you’ve enabled differentiated rate groups, the “Default Rate Group” is used as the default rate for all brands that don’t have a specific rate set under Products → Brands. This means you can have a functional setup without having to set a rate for every single brand from the start.
What about GDPR and cookies?
The Partner Ads cookie contains personally identifiable data (IP address) and requires consent. Make sure your cookie solution is set up to include it. See Cookie Consent and Consent Mode v2.
Need help? Contact us at support@shoporama.dk.
Related articles
Set up Partner Ads in Shoporama: getting started
Introduction to Partner Ads in Shoporama. Understand what it is, what you get out of it, and get started quickly with product feed and tracking.
Include color and size in Partner Ads feed
Guide to adding color, size and gender to your Partner Ads feed in Shoporama via product profiles and extra fields.
Set Up a Google Shopping Feed
Guide til at opsætte Google Shopping Feed i Shoporama: kategorier, custom labels, produkt-id og katalogmatch samt lands- og sprogfeeds.
Google Shopping category ID on products
Select the correct Google category for your Google Shopping feed by searching directly in the field for products and categories, or enter the ID...
Cookie consent and Consent Mode v2
How to set up Shoporama's free cookie consent app: categories, automatic blocking, consent revocation, and Google Consent Mode v2.