Product Profiles and Variants
Guide to product profiles and variants in Shoporama. Understand how profiles, attributes and variants are related.
Product profiles are a central part of Shoporama. A profile defines the attributes and variants a product can have, such as color, size, or material. When you create a product, you select a profile, and the product automatically inherits the attributes defined in that profile.
What is a product profile?
Think of a product profile as a template for a type of product. If you sell clothing, you can create a profile called “Clothing” with the attributes “Color” and “Size.” All products created using this profile will automatically have fields for color and size.
Typical examples of profiles:
- Clothing, attributes: Color, Size
- Shoes, attributes: Color, Shoe size
- Electronics, attributes: Storage Capacity, Color
- Standard, no attributes (for simple products without variants)
Create a new profile
- Go to Account → Webstore → Product Profiles in the menu
- Click Create Profile
- Give the profile a descriptive name (e.g., "Clothing" or "Electronics")
- Click Save
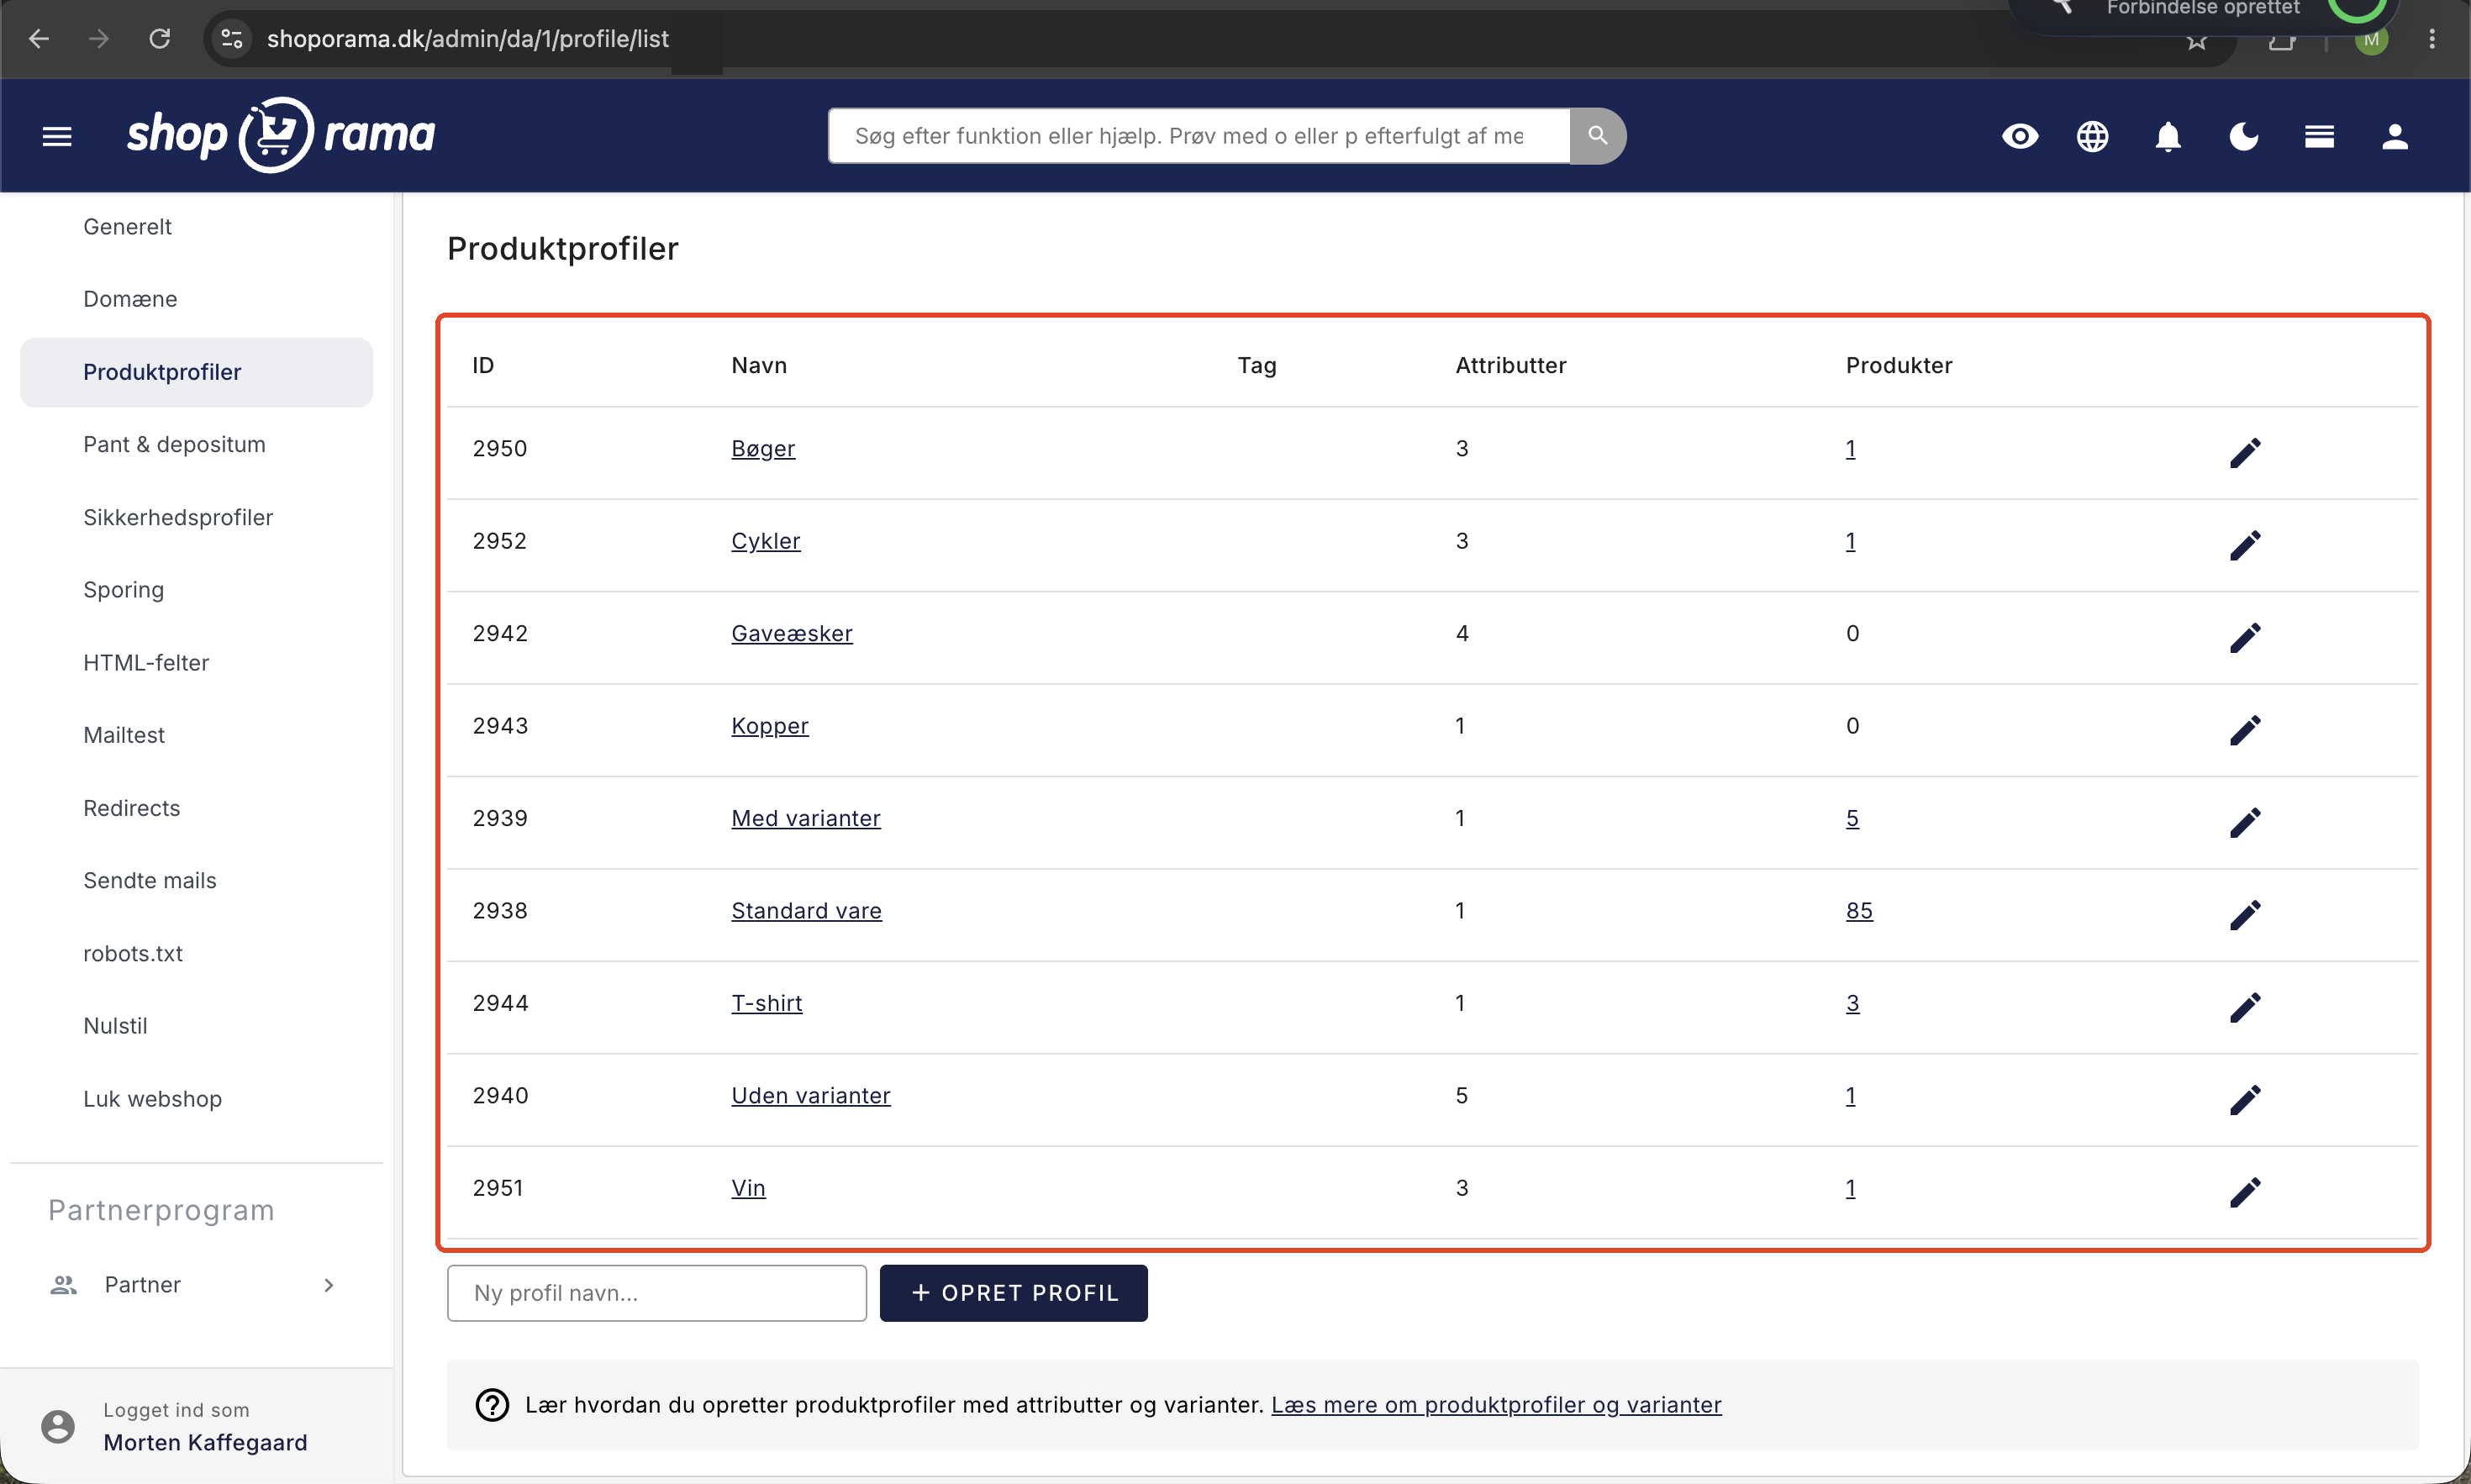
The profile can also have a tag. This is optional, and you can fill it in yourself. It is used for filtering in your theme and in your product feeds.
Add attributes to the profile
An attribute is a characteristic of the product, such as color, size, material, or weight. Once you’ve created the profile, add the attributes your products should have. For each attribute, fill out a set of fields:
- Name: the name that you and the customer see, such as “Color” or “Size”
- Tag: a short ID you can use for filtering and in your theme
- Type: how the value is entered and displayed (see the types below)
- Special Purpose: helps product feeds understand what the attribute means (see below)
- Unit: an optional unit of measurement that appears after the value (see below)
- Variant: Check this box if the customer must select a value themselves at checkout
- Individual price per variant: Check this box if the price should vary by value
How to create an attribute on the profile page
All work with attributes takes place within the individual profile. Open the profile by clicking its name in the list of product profiles. Below the list of attributes, you’ll find the “Add New Attribute” button.
- Click Add New Attribute. The attribute is created immediately and is set to the “List of Values” type. The cursor automatically moves to the name field.
- Enter the name, e.g., “Size.” The name is automatically saved shortly after you stop typing.
- Fill in the remaining fields as needed: Tag, Type, Purpose, and Unit.
- Check the “Variant” box if the customer is to select a value themselves at checkout.
There is no Save button for each individual attribute. Everything is saved automatically, and you can keep track of the progress via the small status text next to the attribute’s name. It first displays “Saving...” and then “Saved” in green. If something goes wrong, it will say “Error” in red. The text disappears on its own after a few seconds.
The Name, Tag, and Unit text fields wait a moment after your last keystroke before saving, so they don’t save after every single letter. Dropdown menus and checkboxes are saved as soon as you change them.
Tip: The “Save” and “Save and Continue Editing” buttons at the bottom of the page only save the profile’s own fields—that is, Name, Tag, and Financial Products. If you’ve only made changes to the attributes, everything is already saved, and you can safely leave the page without clicking the buttons.
Each attribute can be collapsed or expanded using the arrow on the far right. The system remembers which attributes you had open for each profile, so you’ll return to the same view next time. The first time you open a profile, all attributes are expanded.
If the profile has products, a blue label with the number appears at the top of the page. Click the label to view the products in the product list.
Data Types
Each attribute has a type that determines how the value is entered and displayed:
- List of values: a fixed list that you or the customer selects from, e.g., S, M, L. This is the only type that can be used as a variant.
- Text: a free-form text field for brief information
- HTML: Formatted content. Useful for, for example, a nutritional information table on food products.
- Number: a numerical value
- Yes/No: a simple on/off value
In addition to the data type, an attribute can be marked as “Customer-filled.” In this case, the field is no longer part of the store’s own product data but a field the customer fills out themselves on the product page, such as a name for engraving. Customer input also has its own data type, “File Upload,” where the customer can upload an image or a PDF with their order. See “Let the customer fill in fields on the product.”
Tip: Only the “List of Values” type can be marked as a variant. If you change a variant attribute to a different type, the variant marking is automatically removed.
Special Purpose
The “Special Purpose” field tells Shoporama what the attribute actually describes. It is used by product feeds, such as Google Shopping, to categorize your products correctly. You can choose between:
- None
- Size
- Color
- Gender
- Material
- Pattern
- Age Group
Tip: The purpose is automatically inferred from the attribute name for the most common attributes. If the attribute is named "Color," the purpose is automatically set to Color; "Size" becomes Size; and "Gender" becomes Gender. Names such as Length, Width, Diameter, Height, and Weight are set to Size. You can always correct the purpose manually afterward.
Unit
The “Unit” field is a free-text field you can fill in for an attribute. This applies to all attributes, including those that are not variants. In the admin panel, you’ll see a tooltip with examples: e.g., kg, cm, GB.
The unit appears as a suffix after the value itself in the online store. It’s typically used for weight (kg), measurements (cm or mm), storage capacity (GB), power (W), and similar values. For example, if you have an “Weight” attribute with a value of 5 and the unit kg, it will be displayed to the customer as 5 kg.
Variants
A variant is an attribute that the customer selects when adding the item to the cart, such as size or color. You mark an attribute as a variant by checking the “Variant” box. Inventory is managed per variant, so you can see exactly how many you have of each size or color. The variants also appear in orders, on invoices, and in your product feeds.
You can read more about how inventory is kept up to date by variant in the article “Inventory Synchronization with Variants.”
Add variant values
When an attribute is of the “List of Values” type, you add the possible values yourself. You can enter multiple values at once, separated by semicolons, for example:
S; M; L; XL; XXL
You determine the order of the values yourself by dragging them into place.
How to add, edit, and delete values
As soon as an attribute is of the “List of Values” type, it will have a box labeled “Values” at the top of the expanded card. Below the values that have already been created, you’ll see the field “Add value here and press Enter.”
- Add: Type the value and press Enter. It will appear as a small label in the box immediately. If you type multiple values separated by semicolons, they will all be created at once in the order you typed them.
- Edit: Click the pencil icon on the label. The “Edit Value” window opens with the “Value” and “Tag” fields. Press Enter or click “Save.”
- Delete: Click the X on the label. You’ll always be asked to confirm, because deleting a label also removes the stock history for that variant.
The “Tag” field for a value is optional. Just like with the attribute, it’s a short, code-friendly name you can use for filtering in your theme and in feeds.
Tip: If you want each color or size to display its own image, you can attach images to individual variants. See Attach images to a variant.
You can control the order using drag and drop
Both attributes and values are displayed in the order you choose, and you can move them with your mouse:
- Values: Click on a label inside the Values box and drag it to the correct position. The new order is saved immediately.
- Attributes: Grab the handle with the small dots to the left of the attribute’s name and drag the entire card up or down.
New values are always placed at the back. For example, if you create S, M, and L and then add XS, you’ll need to drag XS to the front yourself. This is also how you ensure that sizes are listed in logical order rather than alphabetical order.
Tip: The handle for moving attributes is hidden on small screens. If you need to change the order of the attributes, do so from a computer rather than from your phone.
Multiple dimensions: color and size
There can only be one variant per profile, and it must be of the “List of values” type. If you need multiple dimensions for the same product—for example, both size and color—you cannot make both into variants of the same product.
Instead, use one dimension as a variant and create one product per value of the other dimension. For example, if you sell a T-shirt in three colors and five sizes, make size a variant and create one product per color. Then, link the products using the “Similar Products” feature so customers can easily switch between colors directly on the product page.
There’s a third option if the second dimension doesn’t require its own inventory, SKU, or price: set it up as a customer input field of the “List of Values” type. The customer is presented with two options on the product page and perceives them as two dimensions, but inventory is only tracked for the variant. For example, if you print the color after an order is placed, “Size” can be a variant with S, M, and L, while “Color” is a customer input list with Red, Green, and Blue.
Please note the difference: a customer input list cannot have its own inventory, product number, or price, and the selection does not count as a variant in statistics and feeds. If the second dimension needs to be marked as out of stock or priced separately, you must use one product per value as described above. Read more in Let the customer fill in fields on the product.
Prices per Variant
If the price needs to vary from value to value, select “Individual price per variant” for the attribute. This allows you, for example, to charge a surcharge for size XXL or set a different price for a specific color. Without this checkbox, all variants will have the same price as the product.
Hide fields in product editing
Under “Hide in product editing,” you can choose which columns to hide in the variant table on the product editing page. This provides a cleaner overview if, for example, you never use GTIN or MPN. You can hide these fields:
- Inventory
- SKU
- Secondary SKU
- Cost
- Location
- GTIN
- MPN
- Min. Stock
Tip: The fields are only hidden visually in the editor. No data is deleted, and you can always show the columns again by unchecking the box.
Financial Products
Some products are financial, such as gift cards and credit. These products are automatically excluded from searches and from your product feeds, and they cannot have attributes.
What the administration handles itself
The profile page enforces a number of rules to prevent you from setting up the profile in a way that could cause problems later:
- Only one variant: As soon as one attribute is marked as a variant, the “Variant” checkbox is grayed out and locked for all the others. If you uncheck it again, they’ll be unlocked.
- The type is locked to a variant: The “Type” field cannot be changed while the attribute is marked as a variant, because a variant must always be of the “List of Values” type. First, uncheck the “Variant” box.
- Changing the type clears things up: If you select a type other than “List of Values,” both “Variant” and “Individual Price per Variant” are automatically removed, and the Values box disappears. The values are not deleted; they are simply no longer used.
- Price and hidden fields require a variant: “Individual price per variant” and “Hide on product editing” only appear on an attribute marked as a variant. If you uncheck the variant checkbox, the price checkbox is also removed.
- Financial products and attributes are mutually exclusive: the “Financial products” checkbox is locked as soon as the profile has even one attribute. If you want the profile to be financial, you must first delete all attributes.
- "Purpose" is only filled in when the field is empty: the system automatically suggests a "Purpose" when the attribute name is saved, but only if you haven’t selected a purpose yourself. If you’ve edited the purpose manually, your selection remains.
The Attribute Card on the Profile Page
Each attribute is displayed as its own card. If the card is collapsed, you’ll see a single line with the most important information:
- The handle on the left, which you drag to move the attribute up or down
- The name, which you can edit directly in the field
- The type, shown as a small label: List, Text, HTML, Number, or Yes/No
- The variant checkbox, which appears only on attributes of the “List of Values” type
- The status text, which briefly displays “Saving…” and “Saved”
- The trash can to delete and the arrow to expand the card, on the far right
If you expand the card, the rest appears: the box with values, the Type, Tag, Purpose, and Unit fields, and if the attribute is a variant, also “Individual price per variant” and “Hide on product editing.” The Variant attribute also has a blue line along the left edge, so you can quickly see which attribute is the variant.
Delete an attribute or a profile
To delete an attribute, click the trash can icon on the right side of the attribute’s header. You’ll be asked to confirm, and then the attribute will disappear from the profile. Be aware of what this entails. When an attribute is deleted, the following are removed:
- all of the attribute’s values
- the information entered per variant for the products: SKU, secondary SKU, cost price, location, GTIN, and MPN
- the inventory history for the variants that have been in stock
This applies to all products using the profile, and the action cannot be undone. The inventory history is cleared in the background, so it may take a moment for the numbers to disappear completely. The same happens when you delete a single value, but only for that specific variant.
You can delete the entire profile using the red “Delete” button at the bottom of the profile page. The button only appears if no products are using the profile. If there are products associated with the profile, they must first be moved or deleted.
Shortcuts from the product page
You don’t need to go to the profile page every time you need to add a new size or color. If you’re on a product page with a variant attribute, you’ll see these shortcuts next to the variant table:
- Add variant: Opens a small window where you can enter the new value. You can add multiple values at once, separated by semicolons. The window reminds you that the variant will be added to the product profile and will therefore be available for all products with the same profile.
- Edit variants: Opens the profile in a new tab with the variant attribute expanded, so you can go directly to the values.
- Select active variants: Determines which of the profile’s values are used for this specific product. If you’ve selected active variants, “Showing X of Y” will appear above the table. See step-by-step instructions on how to edit multiple products at once in Active Variants.
- The eye icon in a column header: hides the column for all products with that profile. This is equivalent to checking the box next to “Hide in product editing” within the profile, and existing data is preserved.
Tip: If you’ve set active variants for a product, a new value from the profile page won’t automatically be applied to that product. However, if you add the value using the “Add Variant” button on the product page, it will be added to the product’s active variants immediately.
Learn more about the variant table on the product in Edit Product, and about how out-of-stock variants are displayed to the customer in Show Variants That Are Out of Stock.
Important to know
- You can change the profile of an existing product using the “Change Profile” link on the product page, but this will result in data loss: the values the product has entered in the profile fields are always removed, and if the old or new profile has variants, inventory entries, variant prices, and variant fields such as SKU and cost price are also deleted. Read more in Can you change a product’s profile?
- A profile can only be deleted if no products are using it.
- After editing a profile, you can click the number in the “Products” column in the profile list to see which products use that profile.
Tips for Setting Up Profiles
- Create a few broad profiles rather than many that are nearly identical. This makes maintenance easier.
- Always set the correct “Special Purpose” if you use product feeds, so that, for example, Google Shopping categorizes them correctly.
- Use “Unit” for attributes with measurements so the customer always sees, for example, kg or cm after the value.
- Hide the columns you never use on the product editing page for a cleaner overview.
- If you need both color and size, use size as a variant and group the colors together under “Similar Products.”
Frequently Asked Questions
What exactly is the difference between a profile and a variant?
A profile is a template that determines which attributes a product has. A variant is an attribute that the customer selects when making a purchase, such as size. Inventory is managed by variant, so you can see how many of each size you have.
Can I set both size and color as variants for the same product?
No. There can only be one variant per profile, and it must be of the “List of values” type. Use size as a variant, create one product per color, and link them using the “Similar products” feature so customers can easily switch between colors.
I selected the wrong profile. Can I just change it?
Yes, but be careful. On the product page, you’ll find the “Change Profile” link next to the profile name. When you switch, the values the product had entered in the profile’s fields will be removed, and if the old or new profile has variants, inventory entries, variant prices, and variant fields such as SKU and cost price will be deleted. This action cannot be undone, so if the product has already been set up with variants and inventory, it’s often easier to recreate it with the correct profile.
How do I add sizes to a variant?
Enter the values separated by semicolons, for example, S; M; L; XL. Then drag the values into place in the “Values” box so you can decide whether S or XL comes first.
What types can an attribute have?
An attribute can be a List of Values, Text, HTML, Number, or Yes/No. If the attribute is to be used as a variant that the customer chooses from, it must be of the “List of Values” type.
How do I ensure that color and size are included correctly in Google Shopping?
Set the “Special Purpose” field for the attribute. The options are Size, Color, Gender, Material, Pattern, and Age Group, and they’re used by product feeds like Google Shopping. For the most common ones—Color, Size, and Gender—the purpose is automatically inferred from the name.
Can I set a different price for each size?
Yes. Check the “Individual price per variant” box for the attribute, and you can specify an individual price for each variant value. This is useful if, for example, larger sizes should cost more than smaller ones.
The variant table has too many columns. Can I remove some?
Yes, use the “Hide in product editing” field. You can hide columns such as Inventory, SKU, Cost Price, Location, GTIN, MPN, and Min. Stock. This is purely visual to make the table cleaner; no data is deleted.
What does the “Unit” field mean for an attribute?
"Unit" is a free-text field where you can enter, for example, kg, cm, or GB. The text appears as a suffix after the value in the online store, so the customer sees both the number and the unit.
I want to delete a profile, but I can’t. Why?
A profile can only be deleted if no products use it. First, move or delete the products associated with the profile, and then you can delete the profile itself.
There’s no “Save” button for the attributes. Will my changes be saved?
Yes. Everything in the attributes is saved automatically. Text fields are saved shortly after your last keystroke, and dropdowns and checkboxes are saved immediately. You can tell by the small text next to the attribute’s name, which changes from “Saving...” to “Saved.” The buttons at the bottom of the page only save the profile’s name, tag, and financial designation.
Why can’t I change the type of my variant attribute?
The "Type" field is locked as long as the attribute is marked as a variant, because a variant must always be of the "List of Values" type. First, uncheck the "Variant" box, correct the type, and then check the box again if you still need it.
I added a new size to the profile, but it isn’t showing up on a specific product. Why?
This means active variants have been set for the product, so only the selected values from the profile are used for that specific product. Open the product, click “Select Active Variants,” and check the box next to the new size. If you add the value instead using the “Add Variant” button on the product page, it will be included automatically.
I can’t check the box for “Financial Products.” What’s wrong?
The checkbox is locked because the profile has at least one attribute. A financial profile—such as one for gift cards or credit—cannot have attributes. First, delete the attributes from the profile, or create a completely new profile for the financial products.
Need help? Contact us at support@shoporama.dk.
Related articles
Synchronizing stock with variants
Guide to stock syncing products with variants in Shoporama.
Can I change the product profile of a product?
Explanation of why you can't switch product profiles and what you can do instead.
Show variants not in stock
Guide to display out-of-stock variants in your Shoporama theme so customers can see the full range and sign up for stock alerts.
Active variants: Select which variants each product uses
Select which profile variants each product uses so that empty variants are excluded from Google Shopping and the other product feeds. Edit one...
Related features
Product Profiles and Variants: Set Up Your Product Types
Create product profiles, attributes, and variants in Shoporama with your own prices and inventory, and see how you can customize both color and size.
Product variant
A product variant is a version of a product in a different size or color, for example. Read about variants, inventory management and pricing.
Webshop til tøjbutik
Få en webshop til din tøjbutik med varianter, fælles lager for butik og web, returcenter, og gavekort. Dansk support. Prøv gratis i 30 dage uden...
Active variants
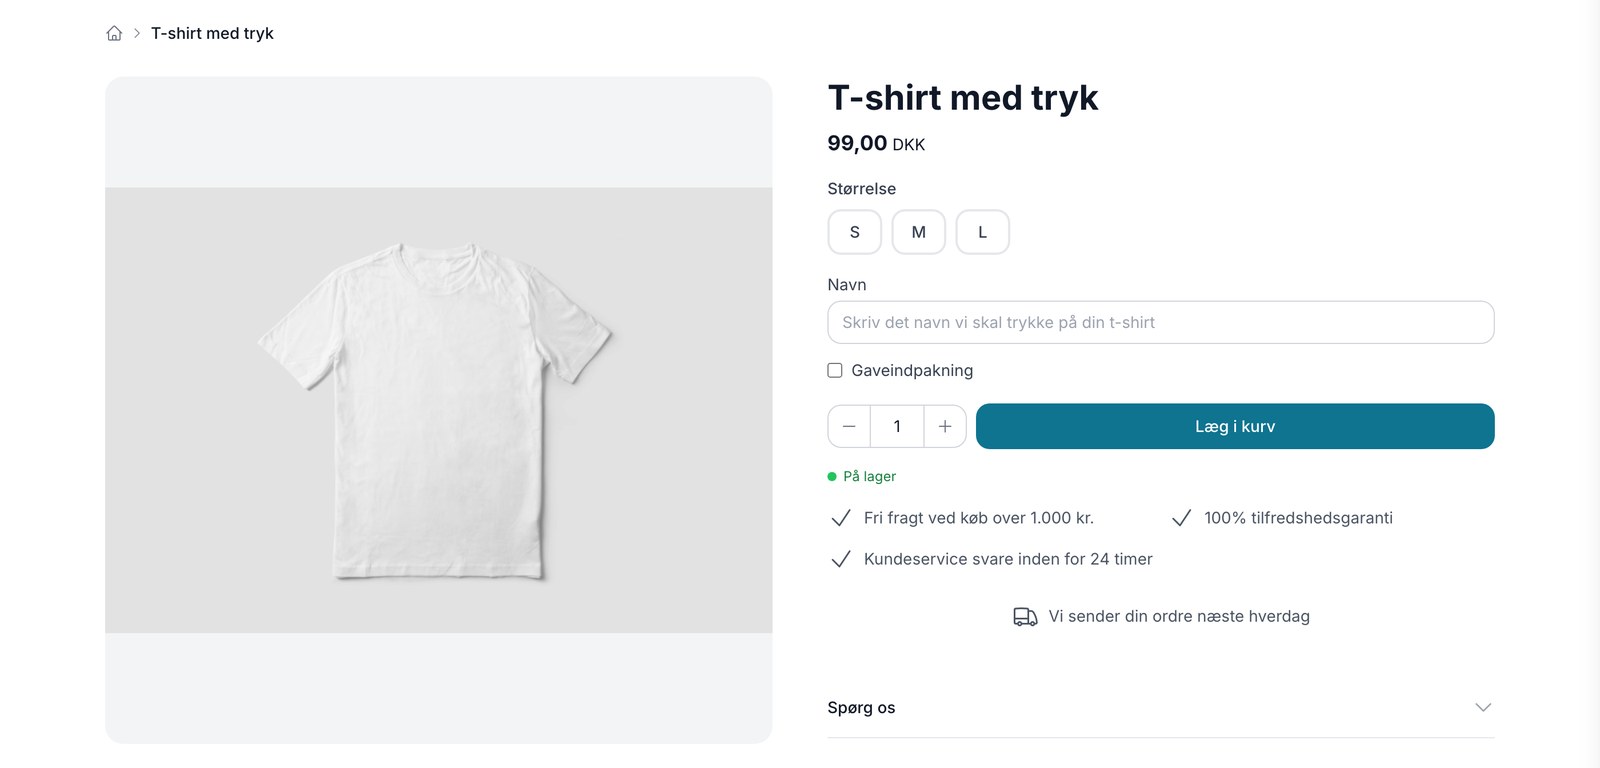
New: Let customers personalize their purchases
Now your customers can enter a name, choose a color, or upload their own design right on the product page. The selections are carried through the...
Product Personalization
Product personalization is when the customer fills in fields on the product page themselves, such as a name for engraving or an uploaded file....
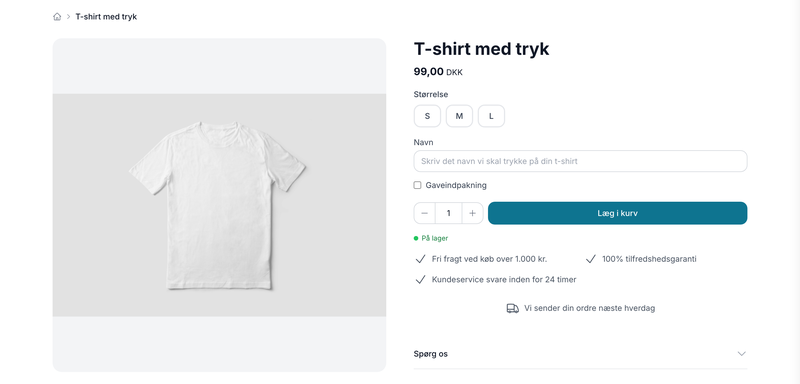
Product Personalization — Let Customers Put Their Own Touch on the Product
Add-ons
Add-ons are accessories that customers can add to their cart with a single checkmark directly on the product page. See how add-ons work in...
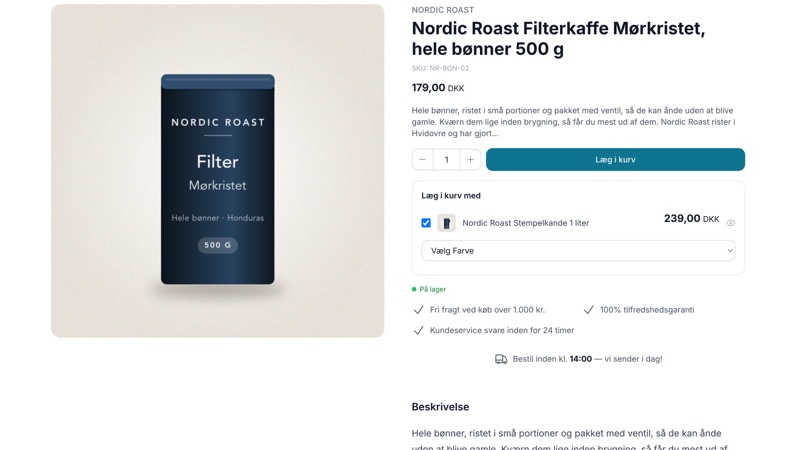
Add-ons on the product page can now have variants
Now, add-ons on the product page can have variants. The customer selects a color or size in the "Add to Cart" box, and the item is included in the...
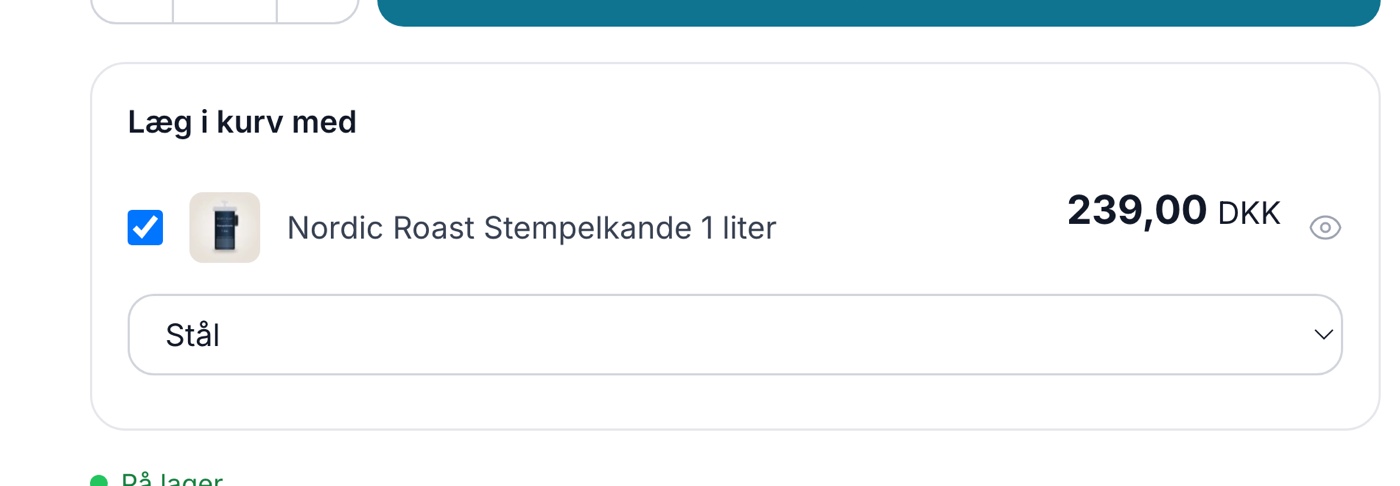
Add-ons: Sell accessories with a single checkmark
Webshop for yarn shop
Start your yarn shop online with Shoporama. Manage color numbers, knitting kits and digital patterns. POS checkout system included. 30 days free.
Webshop for sports association / sports club
Free online shop for your sports club with the FLEX plan for €0/month. Sell clubwear, manage sizes and let members collect from the clubhouse.
Upselling after purchase
Display product recommendations on the receipt page and let customers continue shopping with a single click. Higher order amounts, no need to...
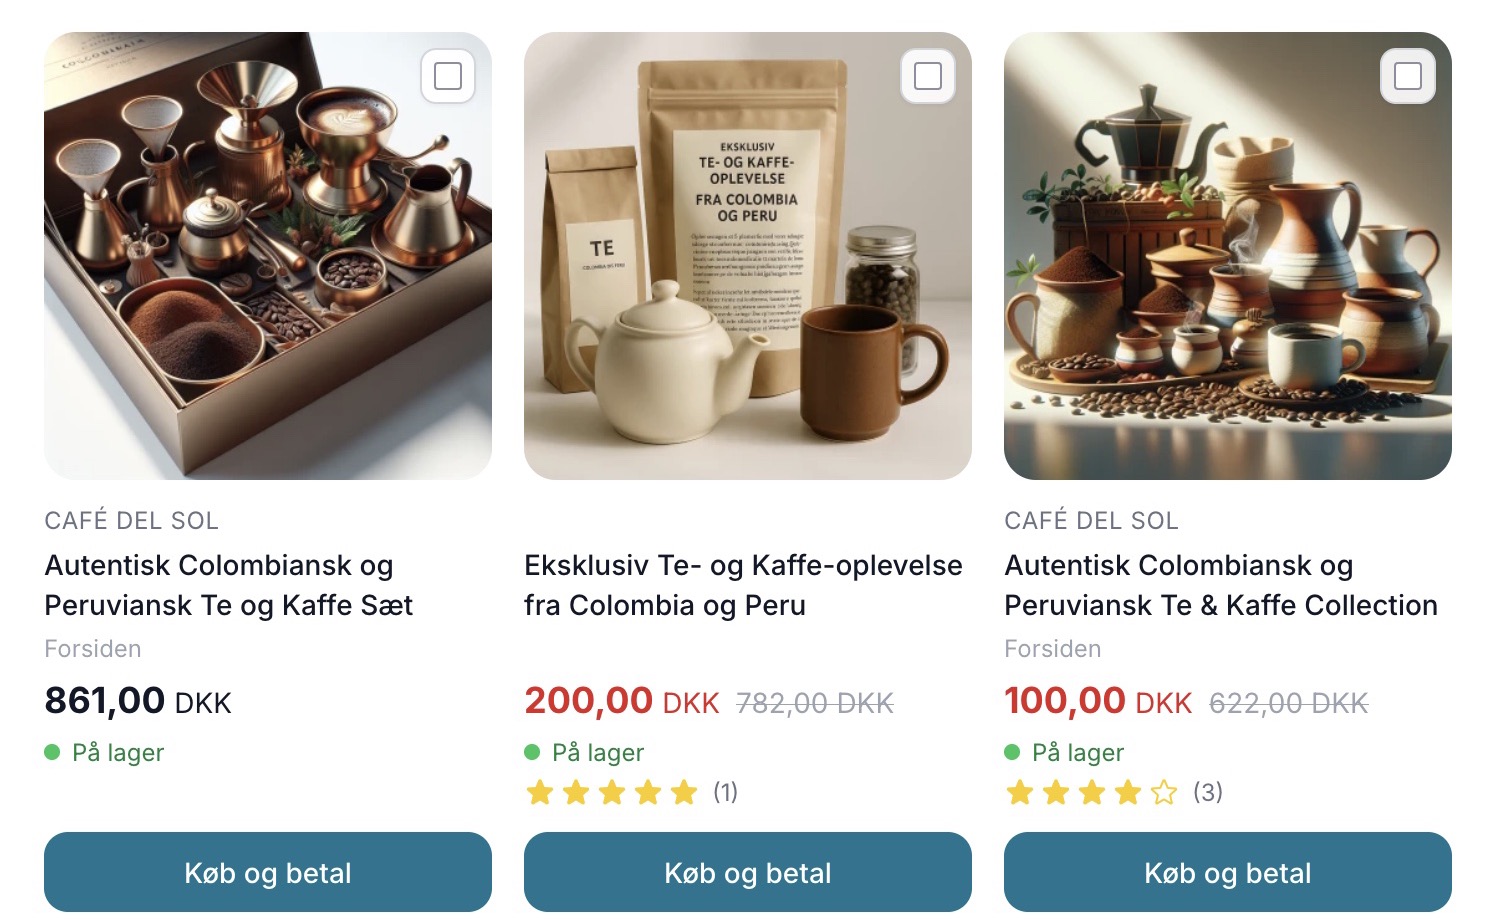
Sælg mere med Mersalg efter køb
Display suggested products on the receipt page that customers can add with a single click. Shoporama's built-in post-purchase upsell feature. No...